Blooming orchid is mystically beautiful and attractive. This plant has always been popular, even despite the harsh price tag in the flower shop. Until recently, there was no question of propagating the orchid itself at home, because this business seemed incredible because of the size of the seeds and their wayward nature.
What a wonderful orchid?
The history of the origin of orchids has long been akin to mythological legends and legends. Some peoples considered the mother of this wonderful flower to be a rainbow when it split into many pieces, while others are convinced that the orchid grew exclusively in the place where the beautiful Aphrodite lost her shoe. But no matter how they disagree, both consider this plant a symbol of rebirth, beauty and great love.
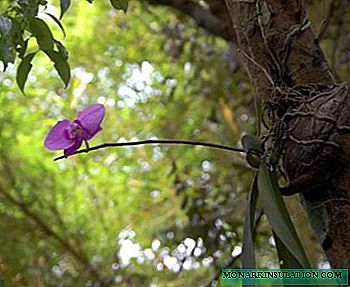
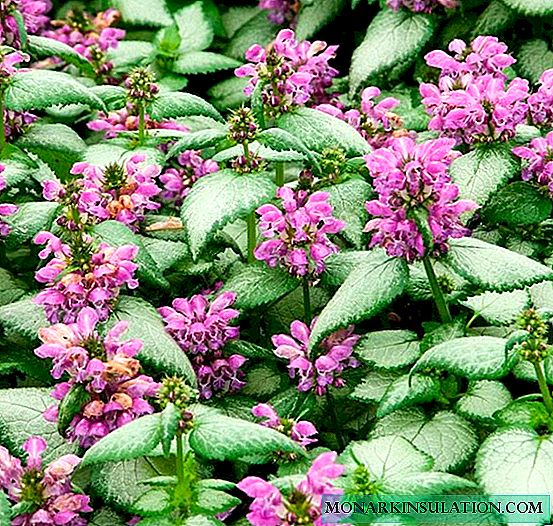
Orchid loves to sprout right on the trees.
Care Overview
If you do not take into account the myths and legends of the flower world and turn to the real world of science, you can find out that the very first orchids were discovered more than 130 million years ago, although they spread in China and Japan only 2 centuries BC.

Orchid species are tens of thousands
In those days, orchids were considered a group of medicinal plants, and Confucius still mentioned this in his writings.. In European countries, an orchid appeared not so long ago, only a couple of centuries ago, but during this time the number of its species reached a figure of 30 thousand.
For the opportunity to grow this flower culture at room conditions, I must say thanks to the botanists. True orchid care can bring a bunch of troubles to a beginner, but amateurs and professionals promise a gratefully flowering plant if you meet the orchid's needs in time, using special knowledge to care for it.
Lighting is very important for an orchid, but it should be reasonably matched. This flower loves bright, but certainly diffused light.

Orchids should be able to shade from direct rays.
Direct sunlight will not destroy the orchid immediately, but it will lighten and stretch the leaves without any prospect of blooming. If you slightly shade the window with tulle or thin lutrasil, the orchid will regularly delight you with color.
From autumn to spring, a period of rest sets in and shading the window no longer makes sense, since solar activity will also wither away. In this important period of time for the flower, shoots mature and the plant lays buds for the next season. It is better to lower the ambient temperature for a period of rest and keep it within 13 ° С-18 ° С, while in the summer season the upper limit can rise to 27 ° С, and the lower one is better left the same. This is due to the fact that in natural conditions the orchid tolerates good temperature differences and this contributes to its active flowering.

After a long and correct period of rest, the orchid will delight in abundant color.
Orchidaceae should be watered abundantly, especially in the most active phase of growth, but in winter the amount of moisture consumed is halved. It is worth noting that drought is not as dangerous for an orchid as a bay, so you need to water the flower carefully and it is better to do it in the shower or leave the flower pot in a container with warm water for 15 minutes, and then allow excess moisture to drain.
Video: how I water an orchid
Propagation of orchid seeds
To grow an orchid yourself is a great temptation and additional stars on the shoulder straps of the florist, but encountering unexpected difficulties in the process of reproduction, many at the initial stages abandon this business, not believing in themselves or simply ruining the material.
And all because orchid seeds are unable to germinate in the usual conditions for other plants - in the ground, and novice growers with great enthusiasm sow orchids in ordinary earthy soil, dooming the seeds to inevitable death.

The structure of the seed, by the example of which you can understand what the seed of an orchid is deprived of
The thing is that the seed material of the orchid does not contain endosperm, in other words, it does not have any nutritional reserves and the embryo receives food exclusively from the substrate, which must have an over-nutritious environment. That is why in the wild, orchids grow in symbiosis with mushrooms, including lower ones.
Where to get the seeds
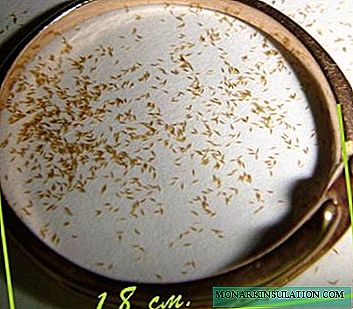
The seed of an orchid is about 15 thousand times smaller than a grain of wheat, that is, it is completely indistinguishable to the human eye without appropriate optics. That is, it is difficult to even imagine collecting orchid seeds, and even more so to sprout them. Flower orchids can be harvested only in an equipped laboratory and therefore, when asked "are there orchid seeds for sale", flower shop sellers only smile silently. But mother nature did not leave her orchid children without the ability to reproduce and compensated for the small size of the seed with its quantity.

Open Orchid Seed Box
One orchid flower forms a seed box, which contains from 3 to 5 million seeds, and due to their small weight, any breeze carries this dust throughout the neighborhood. Seeds settle on trees and undergo severe natural selection.
Video: development of the seed box (5 months)
Seeds are a set of identical cells, unable to develop independently. Even in the right environment, little is lucky to break through to the light, and by a miracle, the sprouted seed can more likely be considered a nodule-like formation, which is also called protocorm. In this state, the seed can stay for a couple of years, if it is not specifically stimulated.
Video: development of the seed box (8-9 months)
Seeds ripen for about eight months, and the ripening period can be 90 days, but this depends on the size of the flower, the age of the plant, the intensity of light, time of the year, and many other factors important for the development of the plant. The seed of Ludisia discolor, for example, ripens within a month, but it is a rare species of orchid.
At that moment, when the seed box is already quite grown, a napkin in the form of a pocket is tied to it from below so that the seed dust does not crumble upon cracking.

Orchid seed dust on a white sheet of paper
A matured box usually darkens and turns brown, but sometimes it may remain green. When, by all indications, the time has come to take the seed crop, carefully cut the box and pour the seeds onto a blank sheet of paper.
Video: seed box ripened
How to germinate
The most reliable way to use seeds for germination is not flower pots or seedlings, but glass dishes and best of all special, chemical type flasks with screw caps. These containers must be sterilized. To do this, use a pressure cooker or an autoclave, if possible. Glass containers are boiled or poured with steam for about an hour (this takes 30 minutes in an autoclave, but the temperatures there exceed the usual 100 degrees).
Germination substrate must also be sterile. Shredded moss sphagnum or a mixture of agar-agar polysaccharides, which are obtained from seaweed, is used as a substrate for germinating orchid seeds, and it is known to all as raw material for edible gelatin.

Agar Agar Powder Raw Material
It is enough to hold the moss in warm water with the addition of a phytoherm or you can boil it quickly, but then it will lose its bactericidal properties, and it will not be easy to maintain the acidity level in the sphagnum, it should stay within 4.8-5.2 ph.

Fresh sphagnum moss
Agar-agar is brought to a boil and after cooling turns into a jelly-like form, but is poured into sterile flasks even in hot and liquid form. Hot agar base with the appropriate additives is poured into the container 30% of the volume, closed with a cork and again boiled for 30 minutes in a pressure cooker or in a conventional pan on the stove.
Video: getting ready for seed germination
There are special, artificial substrates in the form of hydrogels, which play the role of a base in the preparation of a nutrient mixture for germination.
Germination medium should be rich in sugars and other elements.

This is Knudson's nutrient medium: a jelly-like muddy mass
In laboratory conditions, up to half of its volume of fructose and glucose is added to agar-agar per one liter of water. And when preparing the mixture at home, they often use Knudson’s environment, which you can buy at specialized flower shops, and notice its high productivity.
But in practice, they use its modified and simplified form according to the Cherevchenko method. To prepare it, you need to take a liter of water and dilute in it:
- one gram of calcium nitrate;
- a quarter gram of potassium phosphate;
- the same amount of magnesium sulfate;
- half a gram of ammonium sulfate;
- 0.05 grams of iron chelate;
- the same amount of sodium humate;
- one gram of activated carbon;
- a tablespoon of sugar;
- 10 grams of agar agar.
For ease of measurement, you can take as a standard one gram of bulk material as a third of an ordinary thimble, and 0.05 grams on the tip of a knife. In the resulting mixture, orchid seeds germinate en masse, the main thing is to keep the mixture in a sterile and closed container, at the right temperature.
Amateur gardeners often prepare a nutritious mixture from improvised means, for example, dilute liquid Vito fertilizer with half a liter of unsalted tomato juice and add the same amount of distilled water and add a glass of starch with a tablespoon of sugar.
Before placing seeds in the mixture, it is important to pass sterility control, namely, leave closed sterile containers with the substrate sterilized inside for five days. If mold appears inside the end of the term, the sterilization process will have to be repeated.
If the mixture is ready for planting, then it remains to disinfect the seeds. To do this, a calcium hypochlorite solution is usually used, in which you need to hold the seeds for 10 minutes, and then immediately transfer it to a substrate using a pipette. The solution is prepared simply: two teaspoons of bleach are diluted in half a glass of water and the mixture is stirred for half an hour.
We plant germinated material
So, disinfecting the dishes and the substrate separately, and then again together, there is still the risk of introducing the pathogenic spores into the clean environment along with the seeds, so the seeds treated with bleach are transferred to the sterile substrate only through steam treatment. For this, a grid is installed over a pot of boiling water, on which containers with a nutrient mixture are placed for germination inside. Using a sterile pipette, seeds are removed from the chloride solution and placed directly above the steam into flasks or jars. The whole procedure needs to be done very quickly.
Video: try to land
The seeded containers are carefully corked with cotton swabs (sterile, of course) and left in a warm place (18-23 ° C) with a lighting duration of at least 12-14 hours.
At home, even the most pedantic housewife has a bunch of sources for bacterial contamination of flasks. Therefore, before the procedure, it is necessary to disinfect all objects and tools that will be used in the process of preparing the mixture and placing the seeds in their "greenhouses". We recommend using sterile surgical gloves and a gauze bandage for the face.
Video: planting seeds
Replant seedlings
It is possible to grow sprouted orchid seeds on ordinary, that is, non-sterile, soil only after a year. Seedlings are pulled out from flasks or cans by washing. To do this, a certain amount of water is poured into the tank and shaken in circular movements. Thus, the germination mixture is washed out by water and the seedlings can be easily separated from the substrate.
For the new "orchid beds", crushed tree bark, preferably pine, and sphagnum moss are used.

chemical vessel, very convenient for operations with small parts and liquids
A drainage layer of improvised material, pebbles or expanded clay is laid out at the bottom of the tank. The diluted mixture with seedlings is poured into a shallow transparent dish with sides, adding a couple of drops of a basement solution, and the seedlings are transferred to a new substrate using a brush. As dishes, it is most convenient to use a Petri dish.
The humidity in the area of the new orchid beds must be maintained at the same level as for adult orchids, about 60%. The temperature and lighting remain the same as during germination.
Video: Orchid Sprouts
How long to wait for an orchid?
As already noted, the seed box can ripen within three months, and this is the shortest time. Most often, it begins to crack only for 8-9 months.

Orchid seedlings, ready to be washed out from a sterile environment
The seeds sown in the nutrient mixture will also germinate from three months to a year, and the peaked seedlings will wait for a separate pot for a couple more years. An orchid transplanted to a permanent place will bloom in the third year of its independent development.
If we take into account the entire process of reproduction, from tying a seed box to the flowering of a new orchid, then it can drag on for a long seven years. This is if you round. But, subject to all conditions for the favorable development of each stage, the timing can be significantly reduced.
Possible problems
As it has already become clear from the article, the first thing that can be done to make things go wrong is to treat the sowing tank, substrate, seed badly or ignore the sowing point above the steam. Simply put, let in an unfavorable bacterial microflora, which will gobble up the nutrient mixture and the seeds will "starve to death" or become food for the fungus.
The second most common mistake is impatience. Remember, if you checked the substrate for sterility and did everything according to the instructions, there remains only the most difficult thing - to wait. There were times when gardeners lacked patience, and they filmed the process, as they believed that the idea had failed. Meanwhile, it was enough to leave everything as it is, because some processes are simply not visible to the human eye, but this does not mean at all that they do not proceed and do not move us closer to the final goal.
Sometimes it happens that a person is faced with circumstances completely independent of him and, having gone all the way without hesitation, he is faced with curious facts. For example, it turns out that the orchid, from which the seeds were taken, has strong immunity and it simply is not able to become infected with a fungus, that is, the seeds will not be able to receive nutrition and will not germinate. Or a completely opposite situation may arise when the immunity is weak and the fungus will simply absorb the seed material.
It is important to create the necessary mutually beneficial equilibrium of the two environments for sustainable symbiosis aimed at the result.

Orchid seedlings in an ordinary test tube with a nutrient mixture
This is not easy to do, because even in nature the chance of reproduction in orchids is very small, and in the laboratory, seed propagation of an orchid also takes several years. Let the process be started not the first time, but sooner or later it will go on the right track and fragile but charming orchid seedlings will appear.
Step-by-step process
- The first thing to do is determine the degree of maturation of the capsule.Usually it turns brown and begins to crack.

Ripened orchid seed box, not yet cracked
- As soon as it turned out that the seed box has ripened, it is necessary to tie it with a napkin so that when cracking it does not lose material.
- After cracking the seed box, pour the seeds onto a sheet of paper in a bag or other convenient container.
Orchid seeds on a white sheet
- Using the most appropriate recipe, we prepare a nutritious mixture for germination or purchase it in a flower shop.

germinating jelly mixture
- Glass containers for germinating seeds, together with lids, are disinfected by boiling or steaming.
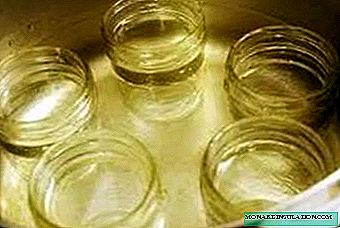
Sterilization of cans by boiling
- The substrate is laid in the processed containers and heat treatment is carried out again

Any glass containers with a tightly screwed lid are suitable for germinating orchid seeds
- We leave closed containers with the mixture for observation for 5 days in order to check for sterility. If the substrate in the tank passes the test, go to the next step.
- In a chloride solution we disinfect the seeds for several minutes and immediately plant them on a sterile substrate through hot steam using a pipette.

planting seeds through steam on a sterile substrate
- Seeds in closed and sterile containers should be kept in the light at a temperature of at least 20 ° C. seeds begin to germinate no sooner than after 3 months.
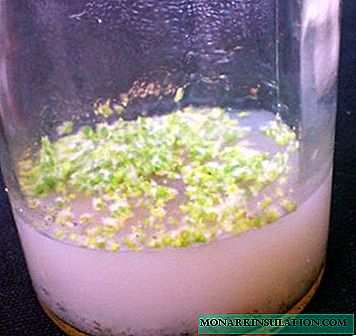
sprouted orchid seeds in a sterile solution
- Transplanting seedlings from sterile containers is carried out in a spacious container with a substrate from the bark and is installed in a cap to create the effect of a greenhouse.

Growing orchid seedlings on a substrate of wood bark


Video: how to grow an orchid from seeds at home
Seed propagation requires maximum concentration of attention, one wrong step and you can start the whole process all over again. You must be extremely careful and diligent so that only after five, or even six years, admire the flowers of those plants that have turned from seed dust into a gorgeous flower of the orchid family before your eyes. But, leaving the irony, I want to note that, despite all the seemingly improbability of the process, the invested work will be rewarded without a doubt!