Hosta seedlings are very expensive. They can be obtained independently from an already adult plant. The host, the reproduction of which is possible in several ways, usually takes root well. How to carry out the procedure correctly is described below.
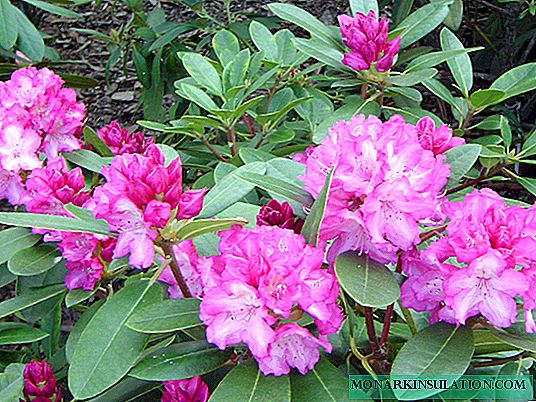
Flower description
Perennial herbaceous plant of the family Liliaceae native to Asia. It grows from May to mid-autumn. Its beauty is in decorative leaves: they can be rounded, narrow or heart-shaped in shape; the color is light or dark green, gray-blue, yellow, bluish, red shades; the texture is smooth or bumpy, glossy or matte. The edges of the leaves can be bordered or wavy, the tip - twisted. On the leaves themselves there are yellow stripes of different shapes and sizes.
What do flowers look like?
Leaves grow from rosettes from the roots and gather in bushes. The host is unpretentious, tolerates cold and even loves shade, for which she received the title of Queen of the Shadow Garden. Average height 50-80 cm (royal, Saint Paul, Atlantis); depending on the variety, the bushes can grow up to 2 m (Saga, Dream Queen, Big Deaddy) or just 5 cm (Delia, Little Jim, Blue Ice).
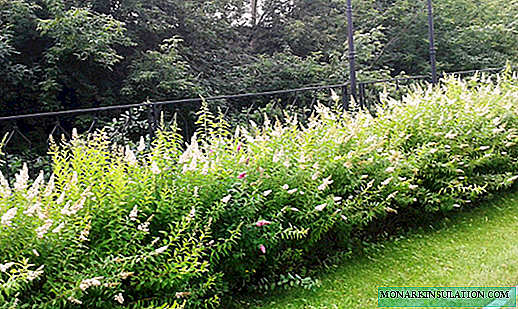
It blooms from mid-summer to mid-autumn. Inflorescences are collected in brushes, flowers in shape resemble bells or wide funnels and have a rich aroma. Hosta flowers are white, purple, pinkish or blue. Peduncles grow up to 1 m in height. The host does not require special care in cultivation, tolerates transplantation, is resistant to pests and diseases, can grow up to 10 years in one place, and the full life cycle - 20 years. The rhizome is dense, with filiform roots.
The host is combined with many other garden flowers: irises, peonies, lilies, kobe, medunitsa, looks great in composition with ferns and conifers.
For your information! The scientific name for hosts is function. There are up to 40 species. In the wild, the host can be found on water areas: riverbanks, lakes, wetlands.
How host propagates
Host propagation methods:
- division of the bush;
- seeds;
- cuttings;
- test reproduction.
The latter option is considered the most effective, it is used in industry. The essence of the process is in growing seedlings in test tubes. The method is divided into microclonal and meristemic.
During microclonal propagation, the shoot or bud of a plant is placed in an artificial environment, where the necessary indicators of light, temperature and humidity are maintained. The grown seedlings are adapted to external conditions.
Meristemic reproduction is designed to improve the plant. Here, the deep kidney cells (meristem cells) are involved, they have a minimal amount of viruses and diseases. The plant is healed using a microscope: the meristemic tissue is isolated and placed in an artificial environment where cells give life to new sprouts. They are carefully checked for infections and only fully healthy specimens are used for further breeding.
Saplings grown by such methods can even be a new species and do not preserve the varietal characteristics of the mother plant, as the artificial environment affects them. Yes, the process is complex, requiring special equipment, so it is beyond the power of the ordinary grower.
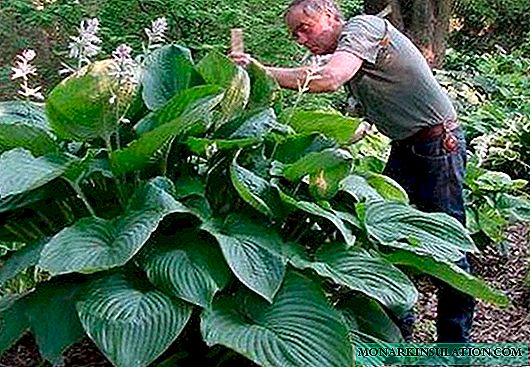
When and how to propagate a host by dividing a bush
By dividing the bush, only an adult, healthy plant is propagated. The larger the bush, the greater the division. To do this, dig the whole bush. In one plot there should be several outlets with leaves. They are planted at the same depth at which the parent plant grew. The distance between plantings should be maintained at about 30 cm. Planted plants are watered abundantly and mulch the soil around with sawdust or dry grass for good survival.
When to share the host? The best time for dividing the bush:
- beginning of May;
- any month of summer;
- beginning of September.
Important! When dividing in autumn, the plant is minimally damaged, since the root system is at a dormant stage.
You can plant a bush when it is fully ripe. A clear sign of the necessary seating is when the center of the crown begins to shrink.
A bush can form up to five years. A young plant does not show its varietal traits, they arise as they grow. Therefore, frequent transplants are undesirable, since you can not wait for the varietal features of the host. The first time you can divide the bush after 4-5 years.
How to split a host
From garden tools choose the right one. It is better to work with a large bush with a shovel, with a small one with a knife with teeth, with a large root use a hacksaw for metal (the cut is treated with ash or grinded charcoal in order to prevent rotting processes).
Before taking the plant out of the ground, a circle with a diameter of 10 cm is cut out around it if the bush is small, and 30-35 cm if the bush is large. Then they shovel under the root with a shovel and carefully extract a plant with a lump of earth.
You need to divide the host carefully so that as little as possible damage the root system. Small roots are carefully divided by hand, large seedlings are divided with a knife with cloves.
Important! It is necessary to cut not the root, but the base.
Slow-growing varieties are best divided into large parts, and well-growing varieties will grow even from one outlet. The whole bush is undesirable to divide into more than four parts.

Roots
Important! To see the entire root system, before splitting it can be washed with water.
The plots are inspected for damage and illness, and suspicious sites are removed.
The soil is prepared either in the fall or a month before planting: dig and add fertilizer. Mineral fertilizers are applied to poor soil.
Delenki planted at the same depth at which the parent plant grew. At the bottom of the hole, some wood ash is poured. The distance between plantings should be maintained at about 30 cm. Planted plants are watered abundantly and mulch the soil around with sawdust or dry grass for good survival.
As a top dressing at first, you can use mullein infusion. Be sure to periodically loosen the ground and remove weeds.
Note! Delenki can not be planted in the old place, as seedlings will take root for a long time and are likely to die.
You can get delenki without digging the whole bush. To do this, choose one or more strong outlets. They are dug up from the outside and carefully separated from the mother bush. The resulting void is filled with fertilizer, the plant is watered abundantly. The resulting dividend is planted first on a prepared bed for growing, and then transplanted to a permanent place.

Division
Propagation of hosts by leaves
The process is simple and quick to execute. Best time to breed:
- mid spring;
- early summer.
This method of reproduction does not damage the root system and preserves the varietal characteristics of the plant.
In young shoots, cut the rosette with part of the rhizome using a sharp knife. The slice is treated with sand. The cut outlet is planted in a greenhouse or shady place and covered with a bottle. Leaves will lengthen for 3-4 weeks.
Important! During growth, the host is watered as the soil dries. The bottle from the plant can be removed for 1-2 hours a day.
When the plant grows, it is transplanted to a permanent place. The earth needs to be compacted, abundantly watered and mulched. The latter applies only to medium and giant varieties, small and dwarf from this procedure can die.
How to grow a host of seeds
How is the host propagated by seed? The plant is difficult to propagate by seeds, as they have low germination. In this way, slow-growing varieties are propagated, and some do not bloom at all and, accordingly, cannot produce seeds. Much also depends on weather conditions. Varietal signs of seed-grown hosts appear after 4-5 years.
Hosta seeds can be bought or collected from an existing bush. They mature within 6-8 weeks after pollination. Ripe boxes turn brown and crack, usually the end of summer or autumn.
Note! Most varieties sprout heavily from seeds. They grow well, for example, Revolution, Sharmon, Allegan Fog.
For maximum evaporation of moisture, the seeds are dried at high temperature and stored at 20-40 ° C. Some gardeners believe that the seeds will grow much better if they are kept for two months in a cold environment (left in the refrigerator from February until planting).
The soil can be bought or mixed independently from peat, periculite and vermit, taken in equal proportions.
Important! Soil and containers for planting are subject to disinfection.
As a container, pots, drawers, cups or cassettes with cells that are sold in a flower shop are suitable. They are treated with medical alcohol. A drainage layer is required at the bottom.
The soil for sowing should be loose, without hard lumps. The container is filled with the finished mixture (peat and perlite must be included) and poured with a potassium permanganate solution and evaporated in a water bath for half an hour. Then let the soil cool.
It is desirable to sow seeds precisely with seedlings in containers, and not in greenhouses, hotbeds or open ground.
Seeds are planted in January. Before planting, they are soaked in a growth stimulator (epine, root, zircon) or a monthly stratification is carried out at a temperature of 5 ° C, since the seeds germinate very poorly.
Planted to a depth of 5-7 mm. Proper landing technology:
- Compact the earth.
- Sow the seeds.
- Sprinkle with perlite.
- Seal up.
This will ensure good contact of the seeds with the ground. Tamping the earth is not worth it, it should be loose. It is leveled and slightly compacted. Ready landings are covered with a film.
At a temperature of about 20 ° C, the first shoots appear in two weeks.
Seedling hosts
Small sprouts must be protected from the sun, moderately watered and remove condensate from the film.

Seedlings
When the first leaves appear, seedlings are transplanted into other, previously sterilized containers with nutrient soil. They are watered by lowering the containers into containers with water (bottom-up method) and left in this form until the ground is completely saturated with water.
Important! Seedlings need to be gradually hardened and accustomed to sunlight, lowering the temperature and regularly leaving sprouts in the sun. It is also necessary periodically to remove the film. You can completely remove it a week after the transplant.
Now the sprouts are ready for independent survival. It is important to choose a good place for them, the host does not tolerate drafts, likes partial shade, some varieties, and prefer to grow in groups. The soil needs slightly acidic, moderately moist, transmissive moisture and air. They have been preparing it since the fall: the necessary organic fertilizers are distributed in the beds at a depth of 10 cm. In the spring, planting begins.

Landing
Note! The brighter the leaves, the more light the flower needs. Varieties with a dark green or blue color should be planted in the shade, since burns can appear on the leaves with an excess of light.
Before planting, seedlings are abundantly watered, after which they are carefully removed from the container, if necessary, spread wide roots and lowered into a previously dug hole. Topsoil with a sprout should be slightly below ground level. The hole is covered with earth, slightly compacted, watered abundantly and mulched with sawdust or dry grass.
The approximate distance between the holes should be 50-60 cm, and if the variety is able to grow to gigantic dimensions, it is better to leave up to a meter.
At first, the hosted plant can be fertilized (once every two weeks until July). In autumn, the soil is fertilized with humus or compost. Water the plant under the roots. The earth should almost always remain wet.
To prevent diseases and pests, the plant is treated with special substances.
Hosta sprouts can also be grown in containers for two years, when leaves are formed, and on the third, plant seedlings in open ground.
If the host plant begins to bloom in the year of planting, it is better to remove the peduncles, since the plant has not yet matured.
Important! If the tips of the leaves turn dark, this is a sign that the plant lacks moisture.
Summer cuttings host
To propagate the host with cuttings, you need to know how to properly separate them from the general bush. The procedure is carried out in May-June. Rare or slow-growing varieties are usually propagated by cuttings. Only those shoots that separate well are selected (usually they have short petioles and small leaves). They should have a heel - a piece of rhizome with roots. The resulting cuttings are planted first on prepared beds or in a greenhouse and watered every day.
For your information! At first, the plant may look lethargic and lifeless, the leaves may fall, but after a few days will rise and get stronger.
When the plants get stronger and take root, you can transplant them to a permanent place.

Cuttings
Preparing the plant for winter, the leaves are cut with secateurs and sprinkled with peat.
The host does not require special care, it is considered a plant for the lazy. It is easy to grow it yourself at home. With its beautiful leaves, it is able to decorate any garden. The main thing is to study everything about the flower, including about reproduction, to get healthy specimens, not sluggish and sick.