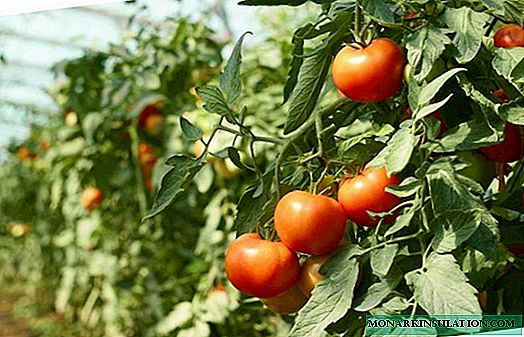
One of the differences between remont raspberries and ordinary raspberries is the weak formation of root offspring. There are practically no overgrowths or few of them. The shoots of substitution usually grows 5-7, all of them are needed to obtain a crop. However, raspberries remain the same culture. And although propagation by shoots is the simplest and most common way for it, there are others.
Assortment of raspberry propagation methods
Modern gardeners have already experienced many ways of propagating remont raspberries: green and lignified cuttings, horizontal layering, part of the rhizome, dividing the bush, "nettle". However, for each case, you need to choose your own effective option. For example, there are varieties whose cuttings are very poorly rooted. By dividing the bush, it is better to propagate old, overgrown plants. Planting material in the form of a part of the root with the accessory bud can be separated from the just purchased seedling. The method of propagation of your raspberries depends on many factors: the age of the bush, variety, breeding season, the ability to create special conditions for rooting, etc..

This is a shoot of ordinary raspberries, the remontant does not give it, and therefore there are difficulties with its propagation
Propagation by "nettle"
For rooting, still young plants are taken, which in the spring only appeared from the ground. At this stage, raspberries are very similar to young nettles. Shoots should be no more than 10 cm high, have two well-developed leaves.

Raspberry shoots, just emerging from the ground, strongly resemble young nettles
What should be done:
- Rake the ground from the base of the shoot and cut it with a white underground part, its length can reach 3-5 cm.
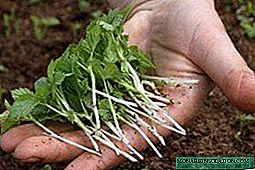
Planting material consists of an aerial green part and an underground white
- Treat the section with a root stimulant (Kornevin, Heteroauxin, Epin, etc.).
- Prepare a loose substrate from peat and sand (1: 1) or peat, turf land and sand (1: 1: 0.5).
- Plant the plant in a moist substrate. The whole white part and another 1 cm green should be in the ground.

Root "nettles" on a bed or in glasses
- Ensure a greenhouse effect: cover with a can, half a bottle, a film, etc. On an industrial scale, rooting takes place in greenhouses with fogging plants. At this stage, the plant has no roots and cannot eat from the ground, so it is important that drops of condensation fall on the leaves and prevent them from drying out.
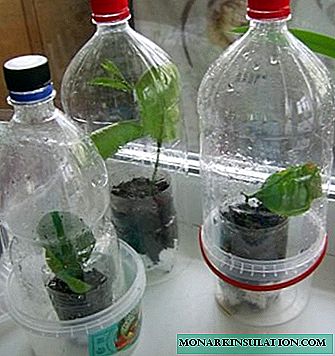
The greenhouse effect can be created with plastic bottles.


If you root shoots in the garden, then place greenhouses from arcs and films in the shade of trees, shrubs, and a fence. In the sun, under a film, plants will be welded. Optimum temperature for rooting: + 20 ... +26 ⁰C. After about a month, you can judge the results. Young offspring will begin to grow, become higher, new leaves will appear on them.

For rooting in open ground, build a mini-greenhouse
Green cuttings
In this way, gardeners root the lateral branches growing on the main stem, and the stems themselves, cutting them into parts with 2-3 internodes. There is experience of rooting even the tops left after pinching too high shoots. But the likelihood that they will take root is very small. So, a gardener-Amur woman managed to root one of the 8 tops. But this is also a result that pleases.
Video: rooting of cuttings taken from different varieties and from different parts of the plant
Rules for the preparation of planting material:
- Cut the green cuttings in June-July, when the shoots of remont raspberries have already grown, but have not yet bloomed.
- When rooting the lateral fruit branches, remove the growth point (top), as well as the buds, if any.
- Each stalk should have a minimum of 2 leaves, a maximum of 3-5. The fewer the leaves, the less they evaporate moisture, but they cannot be removed at all, since it is in the leaves that photosynthesis necessary for plant nutrition occurs.
- Make the lower cut at an acute angle and not parallel to the petiole of the lower leaf.
- Remove the bottom sheet.
- Treat the cuttings with a rooting stimulant and plant them in a loose substrate, immersing the place of regrowth of the lower leaf by 1 cm.

The green stalk should consist of 2-5 leaves, the growth point (top) must be removed
Rooting itself occurs, as in the case of "nettles", in the same greenhouse conditions. On rooted cuttings, shoots should grow from the axils of the leaves, and they can also appear from the ground.
Rooting by lignified cuttings
Planting material is prepared in the fall, in October-November. As a starting material, take annual prolific shoots. By the end of the season they are already covered with wood. Cut them into cuttings according to the same rules as green ones. Only this time, you need to remove all the leaves, if they still remain. After all, the vegetation is over, the buds are laid, and from them young leaves will appear next spring.

Autumn cuttings, instead of leaves, should have well-developed buds
Next, you can choose one of the methods or experiment with both at once:
- Planting in the spring after winter storage. In the autumn, harvest the prepared cuttings in bundles, sign the names of the varieties. Stack in boxes and sprinkle with damp sawdust or sand. Another option is to wrap it in a damp cloth, and then in polyethylene, piercing it in several places for ventilation. Store in a basement, refrigerator or other place at a temperature of -2 ... +2 ⁰C and humidity 65-70%. In March, start rooting on the windowsill, in the greenhouse or greenhouse using technology for green cuttings and “nettles”.
- Landing in the fall, immediately after cutting. Plant the cuttings on a bed with loose soil, deepened so that only two buds remain on the surface. Cover for the winter the usual way for your region: spruce branches, reeds, agrofibre, etc. The material must let air through, so do not use film or similar materials.

Lignified cuttings, scheme of their planting
Skeptics claim that this is the most unreliable way of propagating raspberries. Even if leaves spring from the buds in spring, this does not mean at all that the cuttings gave rise to roots. The buds bloom due to the vitality left inside the cuttings. However, enthusiasts do not refuse this method, because in the autumn after trimming there are a lot of shoots that are thrown away or burned. Why not try rooting? There are positive results: 2-3 out of 10 cuttings turn into seedlings.
Video: propagation by lignified cuttings obtained as a result of autumn pruning
Bush division
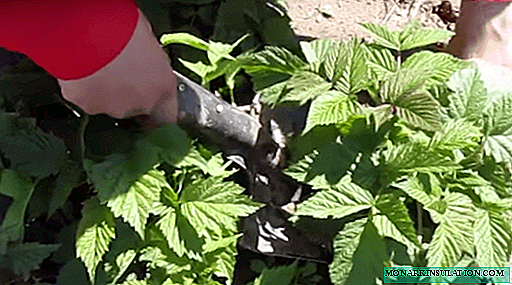
The method is very similar to propagation by shoots. The only difference is that the shoots of substitution at the remont raspberries are very close to each other, they need to be dug up very carefully. Proceed to such propagation in the spring, when young shoots have grown no higher than 15-20 cm. Usually, 5-7 shoots are left for fruiting in the bush, excess ones are cut out. Find a well-grown bush in which such shoots are located away from the rest, so that you can separate them with a shovel.
How to separate the root offspring from the bush:
- Water the plant well, then the earth will not crumble and the seedlings will be able to dig up with a lump of earth.
- Stick a shovel between the mother bush and the shoot you want to separate, deepen it with a bayonet.
If there are more shoots in the bush than necessary, use extreme ones for propagation.
- Make such digs on all sides of the shoot and carefully pull out the roots without brushing off the ground from them.
- Plant the seedling in a permanent place.

If the stems grow close to each other, then another way can be applied:
- Dig up the whole bush.
- Shake the ground.
To better understand the interweaving of the roots, you can lower them into a basin with water and, washing, gently untangle.
- Then divide the whole plant into parts with a sharp knife, so that each one contains 2-3 stems with roots.
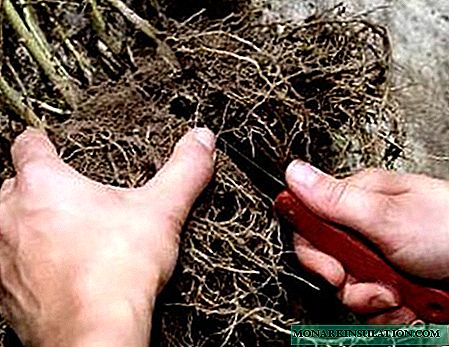
You can divide the bush into several divisions
- Plant the seedlings in the prepared planting pits.

Keep in mind that with this method you risk losing the variety if you share the only bush you have. It may happen that not a single divide takes root. Use this method if you have other raspberry bushes that you want to propagate.
Propagation by root cuttings
Raspberries have a fibrous root system, it consists of many roots, and they have sleeping accessory buds. They wake up and give young shoots. This happens when old stems die, they need to be replaced with new ones. This feature is used to propagate raspberries. If the root or part of the root is separated from the plant, the accessory buds wake up to compensate for the absence of shoots.
Where can I get root cuttings:
- cut off from a seedling with a well-developed root system;
- cut from a growing bush, carefully digging the ground under it;
- buy from breeders, order online.
There are no standards for this planting material. The maximum size is at least the entire root of the bush, the minimum is 8-10 cm, and you may not be able to find the adnexal buds, in the sleeping state they are very small and painted in the same color as the root.
Photo gallery: what the raspberry root cuttings look like

- If the root against the background of the seedling seems large to you, cut off part of it and plant separately


- The minimum size of the root cuttings is 8-10 cm

- Selling raspberry roots is now a profitable business, you can order such planting material on the Internet


- Sleeping kidneys woke up and sprouted

This is the easiest and most effective way of reproduction, compared to those already described.. Procedure:
- Prepare a loose and fertile substrate, mixing peat, soddy soil and humus in equal proportions.
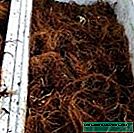
- Pour the resulting mixture into a box or pots, containers, so that 5 cm is still left to the edges. Select the container according to the size of the cuttings, which should be located horizontally in it. You can plant and immediately on the beds in the garden.
- Pour the substrate and spread the cuttings on top of it.

Arrange root cuttings horizontally
- Pour on top of loose earth with a layer of 2-3 cm.
- Keep on a window sill or outdoors, depending on the season. Optimum temperature - + 18 ... +26 ⁰C. Water the soil as it dries. You can cover with film or glass, but this is not necessary.
- When young shoots with a height of 5-7 cm appear, dig the resulting seedling and transplant it to a permanent place. If 2-3 shoots have grown on the handle, each has roots, you can cut the common root into pieces. Sometimes such shoots are easily separated from the old root, along with their roots.

This method is often combined with reproduction "nettle". But for this you need a big, fibrous root. It is used in its entirety: they are spread horizontally on the surface of the garden bed or large box and covered with earth. As the shoots grow back, they are cut off with the white part and planted for rooting. On the root, having lost shoots, more and more new buds will wake up.
Video: combined method of propagation: root cuttings and "nettle"
Propagation by horizontal layering
The implementation of this method on ordinary raspberries begin in early spring. Annual overwintered shoots are bent to the ground. However, in most cases, repair raspberries are completely mowed in the fall, so there is nothing to bend and root in the spring. In autumn, the annual shoots are covered with ripening berries. We'll have to pick off all the fruit branches with them and leave the bare stem. This will become very stressful. Escape, instead of rooting, may die.
So, for propagating repairing raspberries with horizontal layers, you need to let the selected annual shoots winter and root them, like ordinary raspberries, in the spring. Another option is to conduct an experiment in the summer with a young, already grown, but not bloomed, shoot. Once the green cuttings take root, it can form roots and an entire shoot. In any case, choose a horizontal layering according to the following criteria:
- It is located on the north side of the raspberry, in the shade. In the sun, the earth will dry out quickly, the leaves will fade, the roots will not appear or will be weak.
- The stalk is powerful, but flexible, it bends well and lies on the ground.
- There are lateral branches, which after laying the stem on the ground will be directed upwards.

Choose a strong but flexible shoot, preferably with side branches facing up
How to dig in a raspberry shoot for rooting:
- Bend the escape, but do not fix yet. Just try on and make notes on the ground where it will be located.
- Prepare the marked place: loosen the ground, add peat and sand, mix.
- Make a groove for laying the shoot 10-15 cm deep. Fill it with water and let it soak.
- Bend the shoot and cut off from it all the side branches and leaves that rest against the ground or are directed sideways. Leave only those that will grow up.
- At the base of each left branch, scratch the stem, making oblique or longitudinal cuts up to 2 mm deep. You can powder these places with Kornevin powder.
- Now lay the shoot in the groove, pin with brackets of wire and sprinkle with earth. At the same time, do not fall asleep remaining on the stem and lateral branches, they should be above the soil. Leave the top of the shoot about 20 cm long outside, point it vertically and tie it to the peg.
- Cover the digging site with mulch, keep the soil always moist.
If the shoot was laid in the spring, then the seedlings can be dug up, separated from the general stem and transplanted in the fall. When rooting in the summer green shoot is better not to disturb the plant until next fall.
Video: reproduction by horizontal layering on the example of ordinary (non-remontant) raspberries
There are many ways to propagate raspberries. Almost all are timed to a certain season. In the summer, apply green cuttings, propagate in the spring with "nettles" and dividing the bush, in autumn and spring - with rooting of lignified shoots, in summer and autumn - with horizontal layering. The easiest way is to grow raspberries from pieces of roots. We throw away a lot of planting material after pruning, and all this can become new plants. It is interesting to try each method and choose the most acceptable and effective one for your variety and style of farming.