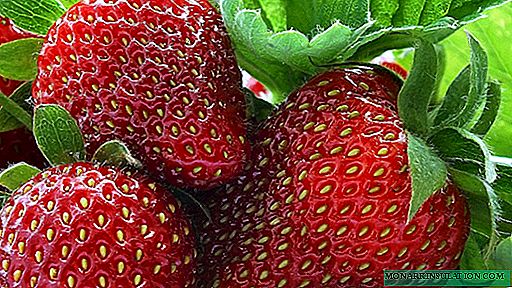
Growing strawberry seedlings with seeds at home is possible not only for the improvement of beds and getting rid of problems associated with chopping fruits or diseases. Sowing fragrant strawberries in pots, you will decorate your home with a floral arrangement and you can enjoy ripe, juicy berries all year round!
We grow garden strawberries from seeds at home
The process of planting and caring for seedlings of fragrant berries at home is significantly different from the usual methods of propagating it. This will require more time, effort and patience.
Many gardeners are afraid to mess with strawberry seeds and just buy seedlings, spending several times more money. In this case, there is no guarantee that they will receive exactly the plants that they were promised. Berries can grow small, and the bushes themselves will not be so fertile. Moreover, purchased seedlings may be initially infected with fungal or viral diseases. It is these factors that are decisive for those who decide to use the seed method of growing strawberries.
Table: advantages and disadvantages of the seed propagation method
| Benefits | disadvantages |
|
|
Grade selection
Strawberries delight gardeners with their varietal variety. Therefore, when choosing seeds for planting, it is important to decide what the berries will be used for and what taste they should have. So, the fruits of early ripe varieties are better used as fresh food, and medium and late ripe are perfect for preservation in the form of jam, jam, compote.
Repairing varieties allow you to collect several crops per season, but slightly inferior in taste to strawberries, fruiting once a season.

For growing in pots, ampoule varieties of removable strawberries are perfect
Another factor is where the young plant will be planted in the future: in unprotected soil, a greenhouse or will remain pleasing to the eye on the balcony. In this regard, characteristics such as frost resistance of a variety and the presence of immunity to various diseases should be taken into account.
You need to know that seeds are not taken from berries of hybrid varieties, because hybrids do not retain varietal traits when propagated by seeds. It is preferable to propagate a hybrid variety bush on the site with a mustache. And if you have no takigo varieties on the site yet, then buy seeds in specialized stores. The F1 on the bag will indicate that you have a first generation hybrid.
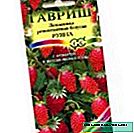
Photo gallery: varieties of seeds of garden strawberries

- The hybrid variety can also be remontant, that is, with continuous fruiting until frost


- Repairing varieties can also be grown from seeds to save money, because the seedlings of such strawberries are several times more expensive than usual


- Even large-fruited hybrid varieties can be grown from seeds in the room

- If the variety is beardless, it means that only seed cultivation is suitable for its propagation.

The dimensions of the bush itself and berries are also important. Experienced gardeners note that seeds of large-fruited strawberry varieties germinate much longer and worse than small-fruited. And for decorative purposes, undersized species are most often used.
For seed cultivation, the following varieties have proven themselves well:
- Homemade delicacy;
- World debut;
- Olbia
- Rusanovka;
- Sakhalin;
- Bogota.
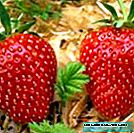
Photo Gallery: Popular Varieties for Seed Growing
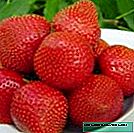
- Bogotá Strawberry is a dessert variety


- Strawberry variety World debut blooms continuously


- Olvia variety early, begins to bear fruit May 15-25

- Rusanovka belongs to the high-yielding varieties of strawberries

How to plant wild strawberry seeds
Planting strawberry seeds is a simple process. And knowledge of certain subtleties of their preparation and sowing will increase the chances of a generous harvest.
Fresh Berry Seed Collection
Buying seeds for planting is completely optional, you can collect them yourself. To do this, you must:
- Choose a ripe, healthy-looking fruit and give it the opportunity to ripen within a few days. Find out in advance the name and characterization of the variety, as hybrid strawberry seeds will not sprout.
- Remove only the top layer from the berry, the core is not used.
- Gently crush the resulting material and put it on a paper or fabric napkin.
- When the pulp dries, grind the mass, carefully selecting seeds.
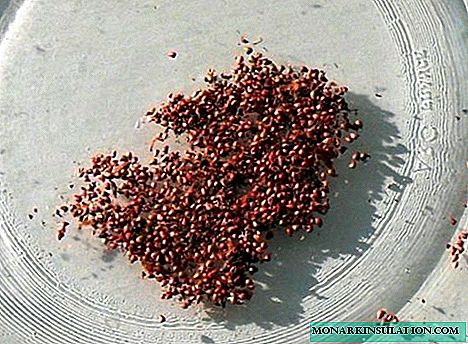
Strawberry seeds are very small, but in one berry there are quite a lot of them.
- Store seeds in an airtight transparent container. They retain germination for 2-3 years.

An interesting fact: strawberries are the only berries whose seeds are not located inside, but on the surface of the fruit, which is why it is called a polyhedron.
There is an alternative way to collect seeds:
- Selected berries are soaked in water for 1-2 days.
- Grind on a sieve or whisk with a mixer with the addition of a large amount of water.
- Filter the resulting mass, choosing seeds.
- The seeds are dried and sent for storage.
Video: how to collect strawberry seeds
Sowing date
At home, you can plant strawberry seeds at any time of the year. The timing is determined when you want to pick ripe strawberry fruits. If sown in February or March, then the berries can be harvested in the summer. But it should be remembered that in this case the sprouts will need additional lighting.
If you sow seeds in June, and then transplant the bushes into a heated greenhouse, you can enjoy fresh strawberries in the winter.
Plants planted in the summer will bear fruit the following year. Under these conditions, seedlings can be planted in open ground in the fall.

If the seedlings by the autumn are poorly strengthened, it is better for them to winter in pots
Germination and stratification of planting material
Germination and stratification is an important part in the preparation of seeds for planting, which allows to increase their germination and accelerate further development.
Instruction:
- Seeds are soaked in water for 2-3 days. This procedure contributes to the destruction of germination inhibitors that inhibit the development of the embryo.
- The swollen seeds are laid out on moistened newsprint or a dense cloth, placed on a plate, then wrapped in polyethylene and put in a warm place.
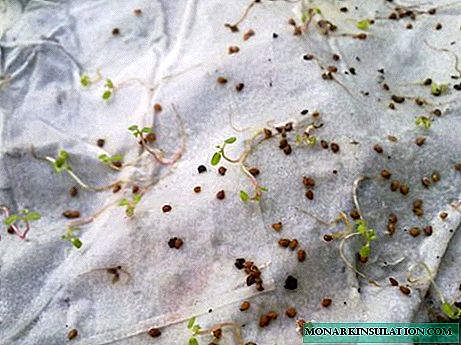
By spreading seeds on cotton pads or cheesecloth, you risk damaging delicate roots when removed
- When the seeds hatch, they are sent to the refrigerator for at least 2-2.5 weeks for hardening, i.e. stratification. Periodically it is recommended to check whether the fabric has dried out and to moisten it as necessary.

Quite often, the seeds are stratified after planting in the ground. They are laid out without deepening on the prepared soil by means of a toothpick and covered with a three-centimeter layer of snow, then the container is placed in the refrigerator. The snow will gradually melt, moistening the soil and drawing the seeds deeper into the ground in a natural way.

Snow is used to stratify strawberries quite often. In the refrigerator, it melts slowly and moderately moistens crops
How to sow strawberries
As a container for planting, as a rule, use plastic containers with a lid, cardboard boxes for seedlings, pots and even wooden boxes. The main condition is the presence of holes for water flow.
The soil for planting should be nutritious and loose, saturated with oxygen, so that delicate sprouts can easily break through. A similar soil mixture can be purchased in a specialized store or made independently. Most often, for the preparation of soil mixed garden soil, river sand and peat in a ratio of 2: 1: 1. It will be useful to introduce mineral or organic fertilizers.
To get rid of pathogenic microflora, it is recommended to heat the substrate in the oven at a temperature of 180 ° C for 15-20 minutes. This should be done 2 weeks before planting seeds - during this time beneficial bacteria will restore their work.
Tip: when heat treatment of the soil, open the windows. This process is accompanied by an extremely unpleasant odor.
Now you can start landing:
- Drainage with a layer of 2-3 cm (coarse sand, gravel, crushed stone) is laid at the bottom of the container, the soil mixture is poured and lightly compacted, moistened with water from a spray bottle.
- Seeds are laid out on the soil surface with tweezers or a toothpick at a distance of 1-1.5 cm from each other and are slightly pressed. It is not necessary to cover them with earth, otherwise they will not rise.
- The container is covered with a lid, glass or film - a mini-greenhouse is created, which is placed in a warm and bright place. The optimum temperature is 18-22 ° C. It is important to prevent direct sunlight, otherwise the seeds will dry out.
Video: how to grow strawberries from seeds at home
Peat tablets have proven themselves well for growing strawberries from seeds. The advantages of their use are obvious:
- sowing seeds is very simple: no preliminary soil preparation is required;
- peat contains growth stimulants, which increases seed germination and accelerates their development;
- water and oxygen freely flow to the roots of shoots;
- further picking of the plant is not required;
- seedlings are less susceptible to disease and decay.
Sowing strawberries in peat washers is easy.
- It is necessary to place them in a container, soak in warm water.
- Then place on the surface 2-3 seeds of strawberries.
- Seeds need to be slightly pressed down with your finger.
Video: planting strawberry seeds in peat tablets
Seedling recommendations
Watering is carried out as the condensate dries on the lid. It is better to inject water with a syringe without a needle, so a weak root system of seedlings will definitely not suffer. If there is too much fluid on the cover, wipe it off and ventilate the plantation. When mold appears on the soil, it is removed with a match and the soil is treated with a fungicide solution (Trichodermin, Planriz).
The first sprouts will appear in 1.5-2 weeks. From this moment, air the mini-beds daily for 20-30 minutes. The lid or film is removed with the appearance of the sheets.
Do not despair if shoots do not appear after 2 weeks. Large strawberry seeds sprout longer.
Strawberry seedlings require adequate illumination - a minimum of 14-hour light day. Therefore, in the winter period, it is necessary to provide additional artificial illumination with a phytolamp or an ordinary table lamp.
A special outlet with a timer will be very appropriate, because the light will turn on / off automatically at the time you set.
With the advent of 3-5 real leaves, plants dive into individual containers. To do this, plastic, peat cups, boxes with cells or small pots are suitable.
Dive Procedure:
- Holes are punctured in the bottom and drainage is laid on the bottom. The soil composition is used the same as for sowing seeds.
- Soil is pre-moistened.
- Saplings are carefully removed, long roots are attached.

When removing the sprouts from the soil, take them out not by the fragile stalk, but by the cotyledon leaves
- Place them in a cup so that the outlet is above the ground.
- When the bushes get a little stronger, they can be spudded with a match.
- A few days after transshipment, plants can be fed potash-phosphorus fertilizers.
- Subsequently, once every 2 weeks, the soil is fertilized with fertilizers containing nitrogen and iron.
- With the appearance of heat, seedlings can begin to be tempered - taken out into the greenhouse or on the glassed-in balcony for several hours a day, gradually extending the duration of the “walks”.

In open ground, seedlings are planted when the risk of repeated frosts passes. Depending on the weather conditions in the region, this may be mid-May - early June. The soil by this time warms up to 10-12 ° C. Seedlings are placed on the bed at a distance of 20-25 cm from each other, and the row spacing should not be less than 30 cm.
Growing strawberries on your own at home, starting with the collection and sowing of seeds and ending with the harvest of juicy fruits, is a laborious, but extremely exciting, activity. Following all the recommendations, you will certainly get a quality result.