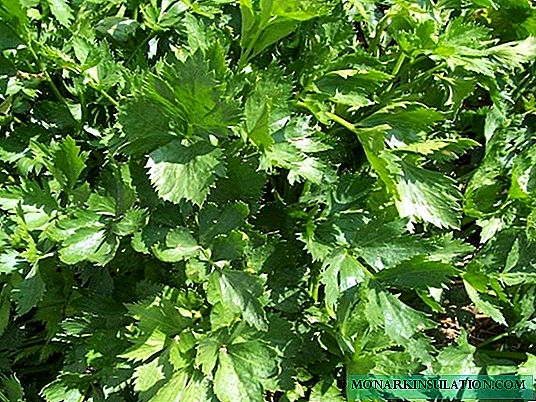
Celery is a wonderful vegetable with a lot of beneficial properties. This culture is generally unpretentious, but it has its own characteristics regarding the sowing of seeds and preparation of seedlings, which you need to know in order to ensure the plant proper growth and development.
Growing celery seedlings
The need to prepare celery seedlings depends on the variety of this crop. Root celery, as well as late varieties of leaf and petiole celery are grown only through seedlings. Early varieties of the last two varieties can be grown and seedlings, and direct sowing in the ground.
As a rule, petiole and leaf celery are sown for seedlings in early to mid-March, root - in late February.
Presowing seed treatment
Includes several activities. Neglect them and immediately sow the seeds in the ground is not worth it. This is due to the fact that celery seeds are difficult to germinate, since they are covered with a shell of essential oils, and it needs to be washed off.
For pre-sowing work and irrigation, use only soft water - boiled, thawed, rain or settled for at least a day.
There are several options for preparing seeds for sowing, and you can choose the most convenient for you.
Option 1:
- Disinfection. Prepare a bright pink solution of potassium permanganate (1 g of powder per 200 g) and place the seeds in it for 30-40 minutes. Then remove, rinse in clean water and dry.
- Soak. Put the seeds on a plate or in a container and fill them with water at room temperature so that it covers them by 3-5 mm. You do not need to add a lot of water, since the seeds in this case can suffocate. Soak the seeds for 2 days, changing the water every 4 hours. If the seeds have swollen earlier, then it is necessary to drain the water and begin to germinate, since their further stay in water can adversely affect germination.
- Germination. Put a moistened piece of cloth on the bottom of the plate or container (it is better to take cotton material or gunny). Put seeds on it and cover with a second moistened piece of cloth. Remove the workpiece in a warm place for 3-4 days.

Pre-sowing treatment helps accelerate the germination of celery seeds
Option 2:
- Disinfection. It is carried out in the same way as in the previous case.
- Stratification. Place the washed and dried seeds on a plate covered with a damp cloth, cover with another moistened piece of cloth and keep at room temperature for 7 days. Then place the plate in the refrigerator on the lower shelf for 10 to 12 days, putting it in a bag. The fabric needs to be moistened all this time, preventing its drying out.

Stratification is an effective way to germinate seeds
Option 3:
- Warming up. Pour the seeds into the bowl and pour hot water (50aboutC - 60aboutFROM). Stir and leave for 15-20 minutes.
- Cooling. Drain the hot water through a sieve and place the seeds in cold (15aboutC) water for the same time.
- Drying. Drain and dry the seeds to a loose state.
Seeds must be sown in the ground immediately after these procedures.
If you bought seeds, then carefully study the packaging: it may indicate that the seeds have already passed all the necessary preparations, and you can immediately sow them in the ground.
Sowing seeds in the ground
- Prepare containers for sowing (you can take general containers or individual containers with a volume of 250 - 500 ml), make drainage holes in them, pour 1-2 cm of drainage material (fine gravel) and fill with soil. Composition: peat (3 parts) + humus (1 part) + turf land (1 part) + sand (1 part). Of the fertilizers, you can use urea (0.5 tsp / kg of soil) and ash (2 tbsp. L / kg of soil).
- Moisten the soil and wait until the moisture is completely absorbed.
- Gently lay the seeds on the ground and lightly sprinkle them with peat or wet sand, not compacting. You can do without powder, and just slightly press the seeds into the ground - celery sprouts well in the light.It is better to sow the seeds in rows, observing the distance between them 3-4 cm. If you sow the seeds in separate containers, then place 3-4 seeds in them.
- Cover the workpiece with foil and place in a bright place. Until seedlings appear, provide crops with room temperature.

When sowing celery seeds, they do not need to be deepened - they germinate well on the surface
As a rule, seedlings appear after 10-14 days, sometimes this period is extended to 20 days. During this time, conduct timely watering and daily airing (10 minutes, 2 times a day). After the emergence of shoots, remove the film and try to provide them with a temperature within +13aboutC - +15aboutFROM.
Sowing Celery Seeds (video)
Pick
- If you planted celery in a common container, then you will need to dive seedlings. This procedure is necessary when 1-2 real leaflets appear on seedlings. For this purpose, prepare separate containers with a volume of 250-500 ml (you can use peat pots), make drainage holes in them, pour a layer of drainage material, and soil on it (universal vegetable mix and a mixture for sowing).
- 2 hours before the pick, spill the soil in containers with sprouts so that they can be easily removed.
- Moisten the soil in prepared containers and in the center do holes 3-5 cm deep.
- Carefully remove the sprout from the common container, being careful not to destroy the lump of earth, and place it in the hole.
- Sprinkle the sprout with soil without compacting it and water it.
- Put the pots in a bright place, the temperature of which is within +15aboutC - + 17aboutFROM.
There is no consensus among gardeners whether to pinch celery roots during a transplant. Proponents of this measure argue that pruning the main root is useful, as it will stimulate the development of the root system. Opponents assure that it is impossible to injure the roots in any case, since the plant in this case adapts worse and slows down its growth, and if you plant root varieties it poorly forms fruit. If you decide to carry out this procedure, then remember that you need to pinch the main root by a third, if its length exceeds 5 cm.
If you have sown seeds in separate pots, then you do not need to pick. Instead, remove the weakest sprouts, leaving the strongest.
Pickling celery seedlings (video)
Seedling Care
Caring for celery seedlings is uncomplicated and includes several simple activities.
- Watering. Carry out as the soil dries up with soft water at room temperature. Try to water the sprouts under the root to avoid decay of the leaves.
- Loosening. Gently loosen the soil after watering to avoid the appearance of a crust and provide oxygen access to the roots.
- Top dressing. Gardeners often use a solution of nitrophoska (1 tsp fertilizer in 3 l of water). For 1 pot, 2-3 tablespoons are required. mixtures. Feeding should be done 2 weeks after a dive. Spend the same fertilizing 2-3 more times with an interval of 15 days.
- Light mode. The optimal longitude of daylight hours for celery is 8 hours, so plantings must be illuminated with a fluorescent lamp.
Some gardeners are faced with blanching celery seedlings. If such a problem occurs, feed the shoots with a urea solution (0.5 tsp granules dilute in 1 liter of water) 2-3 times with an interval of 10-12 days.
Planting celery seedlings in the ground
Unlike other crops, celery does not require special site preparation. But there are several rules, the implementation of which will positively affect the growth and development of your plant.
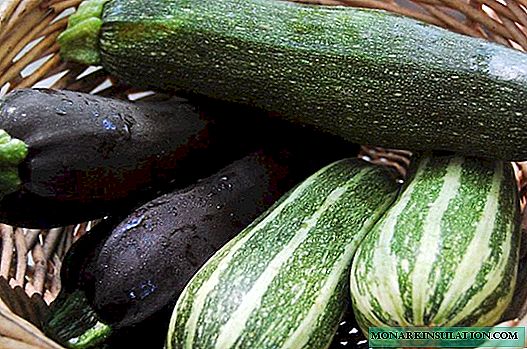
Good predecessors for celery are tomatoes, cucumbers, cabbage, zucchini, pumpkin, bush beans and spinach. Planting celery in the place where carrots, potatoes, corn and parsley was growing before is not recommended.
Celery grows well on light fertile soils - loamy or sandy loam, groundwater should be located at a depth of 1.5 m. It is advisable to place the garden in the sun or in light partial shade.
The site is recommended to be prepared in the fall. For this purpose, apply the following fertilizers per 1 m to the soil2:
- organic matter (manure) - 5 kg;
- superphosphate - 40 g;
- urea - 20 g;
- potassium chloride - 15 g.
If you did not succeed in fertilizing the plot in the fall, then in early May, add dry manure or humus (5 kg / m2), and add the rest of the fertilizer directly to the planting holes.

Healthy seedlings of celery at the time of planting in the ground should have at least 4 leaves
Celery seedlings begin to be planted in mid-May, when the soil warms up to +8aboutC - +10aboutC at a depth of 10 cm. At the time of landing in the soil, the shoots should have 4-5 leaves, reach a height of at least 10 cm and be bright green in color. The optimal seedling age is 55-65 days (for leaf and petiole varieties) and 70-75 days (for root varieties).
2 weeks before planting, the sprouts must be tempered. For this purpose, take them out into the open air, first for 2-3 hours, gradually increasing the time. 1-2 days before planting, you can leave the seedlings in the open air all night.
The technology for planting celery seedlings is as follows:
- Dig a plot and level the ground with a rake.
- Make planting holes in the ground. Their depth should be equal to the size of a clod of earth on the roots. If you have not fertilized the plot completely, then add a handful of ash to each well. The location of the holes depends on the variety: for root varieties - 40 cm from each other and 40 cm between rows (some gardeners prefer to plant such celery in 1 row), and 25 cm between holes and 25 cm between rows - for petiole and leaf varieties.
- Carefully remove the sprout from the container by turning it over. To make this easier, do not water the seedlings for several days before transplanting. Try not to damage the earth. If you used peat pots, then plant seedlings with them.
- Place the sprout in the hole, sprinkle with earth (in root varieties you can’t bury the root neck - the place where the stem goes to the root), and water well.
It is quite possible to place tomatoes, cucumbers, potatoes, green onions and some types of cabbage (white cabbage, broccoli and kohlrabi) on the same bed with celery.
Planting celery seedlings in the ground (video)
As you can see, the preparation of celery seedlings, although it takes a lot of time, is not difficult, so even beginners will cope with it. Follow all the tips, do all the work in a timely manner, and your celery will surely please you with a good harvest.