In the summer cottage there are always such shady places where no ornamental plant survives. It can be a meter long strip along the foundation of the building, land under tall trees, areas near solid fences, etc. Even the grass takes root there weakly and is suppressed by weeds. In such a situation, you can solve the problem in an unusual way - to plant real mushrooms in a problem place. They just do not need light. The main thing is shadow, moisture and heat. We will figure out which mushrooms take root well in summer cottages and how to use live and artificial mushrooms in the design.
The best mushrooms for the garden
There are two groups of real mushrooms that can be planted in your country house.
Forest species of mushrooms
The first group is natural mushrooms that grow in forests. If your site has retained its originality to the maximum, resembles a picture of wildlife, then it is the forest mushrooms in it that will look organic.

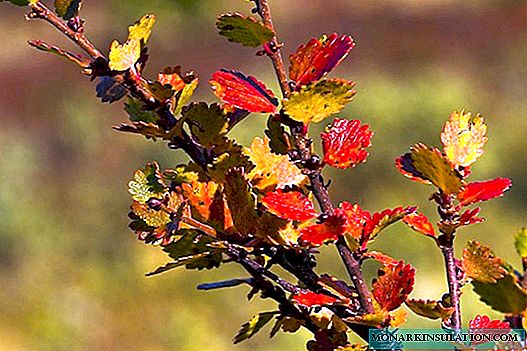
The mushroom mushroom mushroom grows very quickly, so in a year all empty places in the flowerbed can be filled with shiny hats of forest handsome
Not every forest "resident" takes root on the site. No species likes fruit trees, which means mushrooms have no place in this part of the garden. But birch, oak, ash, aspen, conifers are the best "partners" for mushrooms.
The mushroom picker braids the root system of trees, helps it to actively develop, and in turn takes nutrients for itself. Without such symbiosis, forest mushrooms cannot grow. Moreover, each species (boletus, boletus, etc.) requires a tree of the same name.
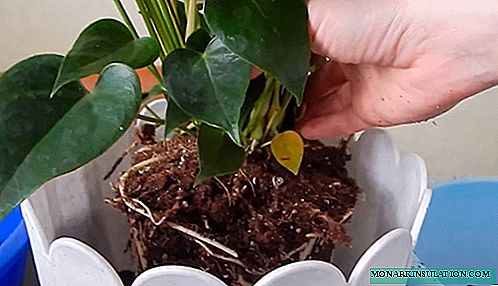
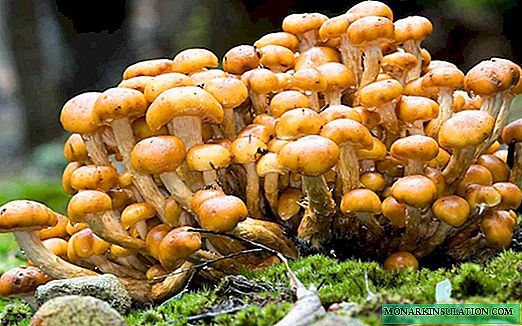
The most adapted to relocate can be called oyster mushrooms. They only wish there was a forest stump! If there are old trees on the site, then they should not be uprooted with roots. Cut down the trunk, leaving a stump of a meter high, and "hook" honey mushrooms there. About five years they will delight you with an unusual design and delicate taste (until the stump decays completely).
But how to breed mushrooms in the country:
- Wait until autumn, when mushrooms appear in the forest.
- Cut the old tree into chunks 0.5 meters high and immerse them in water for 3 days.
- Wet the tree stump with water, pouring a hose or watering can on top.
- If the wood is dense, without cracks and chips - walk along the chocks with an ax, making longitudinal cuts.
- In the stump, hollow a hole in the center.
- Dig the chocks halfway into the ground, choosing a shady and moist place on the site. You can right near the stump, if tall trees are sitting nearby or a shadow from the building falls. At the same time, pay attention to the chock to become correct: the lower part of the trunk - into the ground, the upper - out. If you mix it up, moisture will accumulate weakly in the wood, since it is used to moving from the roots to the crown, and not vice versa.
- Go to the forest and pick up a bucket of overripe mushrooms, in which the hats are already limp and have become sticky. Grab a bag of moss in the same place.
- Chop mushrooms into small pieces and fill with settled water from the barrel so that they are completely submerged.
- Press down so that they do not come up, and leave it to get wet for 5 hours.
- Pour the finished mixture onto the chocks, trying to moisten all areas evenly, and hammer hard particles of the mushroom into the cracks on the chocks.
- Cover the tops of the chocks with moss so that it retains moisture.
- Pour part of the mixture into the hole on the stump, cover it with damp sawdust, and peat on top.
- Spill the remains of the mushroom solution near the dug chocks and under the trees to infect a large plantation with mycelium.
- If the autumn is dry - water the stumps, keeping them moist until winter.
In two years you will have your honey.

Mycelium of various forest mushrooms today can be bought on the Internet or in specialized stores. A kilogram of mycelium is enough for dacha decor
To speed up the growing process, you can buy a ready-made mycelium. In this case, the entire process of replanting the fungus is carried out in the spring.
Artificially cultivated varieties
It is much easier to grow mushrooms that are cultivated by humans. These are champignons and oyster mushrooms. Their substrate is sold in many stores, and in different forms: in blocks and bags.

To buy mycelium in sticks (or sticks) is for those summer residents who just need to create 2-3 mushroom hemp, as their packaging starts from 100 grams.
Laundry baskets can be called the original capacity for planting oyster mushrooms. They are well ventilated and fit well into all rustic landscape styles.

Linen baskets are beneficial for growing mushrooms because they are bought for many seasons, because plastic is not subject to decay and at the same time has a beautiful appearance
Instructions for planting oyster mushrooms:
- In the fall, harvest straw or chopped stalks of harvested corn. A bag of straw goes to 1 laundry basket.
- At the end of winter, buy oyster mushroom mycelium (a kilogram will cost about 3 cu).
- In February, the straw substrate should be soaked in the bathroom for 3 hours (initial water temperature 95-90 degrees).
- Drain the water, and leave the straw to cool completely in the bathroom.
- Tamp the straw into the laundry baskets, sprinkling the layers with mycelium. For 1 basket, count 300 grams of mushroom mycelium. Total kilogram is enough for 3 baskets.
- Put it for a month in a basement or dark room until the outside temperature reaches about 10 degrees.
- Take the baskets to a shady place where they will stand until the fall.
- Irrigate the straw daily through slots and from above to maintain substrate moisture.
- The first wave of mushrooms should go by June.
The mushroom basket bears fruit for one season. In the fall, the straw substrate can be used as a covering material for strawberry beds or buried in a garden where you plan to plant cucumbers in the spring.

The first signs of mushroom growth will appear on the basket after about a month, forming a solid white coating on the outside of the walls

Instead of a linen basket, you can use plastic buckets to grow oyster mushrooms by drilling 7-8 large holes in them. They are suspended from a ledge or wall of a building
Artificial mushrooms in the landscape
If you have no time to care for live mushrooms, you can decorate the site with artificial ones. They will delight the eye all year round, regardless of the weather.

Mushrooms for the decor of the site are created from such popular materials as concrete, gypsum, wood, plastic bottles and polyurethane foam.
Mushroom Decor Tips
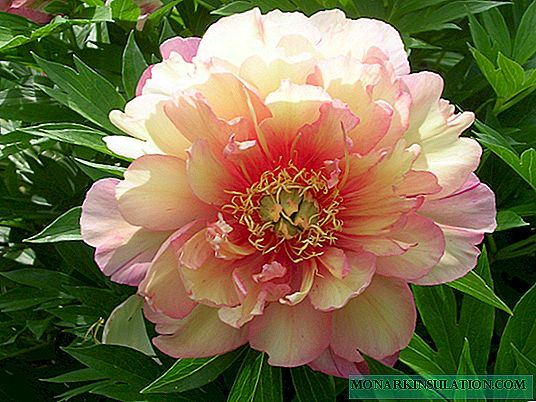
Under the Christmas trees and tall conifers, boletus and boletus look organically, and among birches and flower beds - fly agaric. If the landscape on the site is close to natural, then the size of the mushrooms should be appropriate. A huge boletus under a dwarf thuja will look like an alien element.
On playgrounds and in fabulous landscapes, forest mushrooms look great on whose legs the face of a fairy-tale character is painted.

The super-large sizes of a decorative mushroom are justified only when a mischievous fairy-tale character, a forest man, is hidden under a hat, and not an ordinary boletus or russula
Mushroom theme can be used in the recreation area for furniture. Chairs are created from hemp, covering them with dermatine hats. Inside the cap there is soft foam or old rags.

Old stumps, covered on top with bright hats made of waterproof dermatin, look much more interesting than bought stools, but almost nothing costs
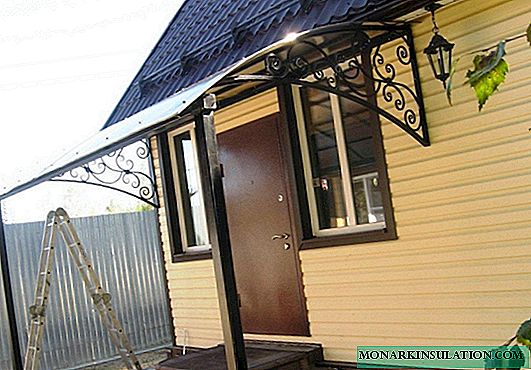
If the site for the toilet was unsuccessfully selected - decorate it under the mushroom. And the structure seems to dissolve in the landscape.

It’s hard to guess from the outside that under the cover of such an original mushroom-boletus hides a prosaic, but such a necessary element of the site - a toilet
Mushroom creation workshop
This noble mushroom can be made from polyurethane foam. You will need:
- spray can of construction foam (winter);
- two-liter plastic bottle;
- a round box of candy;
- stationery knife;
- primer;
- putty;
- acrylic paints;
- varnish for outdoor use.
Working process:
- We fill the bottle with sand. She will be the main support of the mushroom.
- Apply foam to the bottle in layers. At the base - the layer is thicker, to the neck - narrower. This will be the leg of the mushroom.
- Foam the candy box in a circle to get a mushroom hat.
- We are waiting for drying.
- Cut off the irregularities of the foam with a clerical knife, giving the desired shape.
- Holes and voids that appear (this happens if the foam is unevenly laid) are re-foamed.
- Once again, we cut the excess.
- We connect the cap and the leg: cut a round hole in the center of the bottom of the cap. Fill it with foam and immediately put it on the leg so that the tip goes inside the hat. The foam will dry and hold the parts together.
- Cut off after drying excess. We are grounded.
- Coat the boletus with putty using a rubber spatula.
- Primed again.
It remains to paint in the desired color and the mushroom is ready!

To create mushrooms, buy mounting foam for winter use, as it is not afraid of frost, which means that your decor can stand on the street all year

Mushrooms made of polyurethane foam are simple in execution and light in weight, but after drying, the foam becomes crumbs and is afraid of sharp objects
Amanita from egg boxes
If several cardboard containers for eggs have accumulated in the house, put them into action. Using papier-mâché technique, create spectacular fly agarics.
To do this, you will need:
- several egg containers or 1 tray for 30 eggs;
- narrow-necked plastic bottle;
- cardboard tube on which wrap foil or film.
- PVA glue;
- gloves
- acrylic putty;
- paints, brush.
Work sequence:
- We cut off the neck of the bottle, dropping about 10 cm from the place of twisting the cork. It will be a hat.
- We pull it on top of the tube, crushing the cardboard so that the hat fits tightly on the leg.
- The bottom of the bottle is also cut off at a height of 5 cm. This part will be a support for the fly agaric leg.
- Soak the egg packaging in warm water until it breaks up into individual fibers.
- Squeeze out the viscous mass and pour in PVA glue (about 100 grams per 1 tray).
- We insert the mushroom into the support from a plastic bottle and hammer all the empty space with a viscous mass of cardboard.
- Leave until completely dry (and glue at this time covered with a film so as not to dry).
- After making sure that the fly agaric stably stands in the support, we proceed to decorate it. It is necessary to completely cover the hat and leg with a viscous cardboard mass, i.e. mold from this beautiful mushroom. Coat gradually, allowing each layer to dry.
- Cover the fully dried fly agaric with putty. It smooths the surface, making it smoother.
- Leave to dry for a day, and then paint.
- So that the paints are not afraid of rains, cover the finished product with a protective transparent varnish.
In winter, fly agaric is better to put into the room.

Cardboard tube from under the film will serve as a foot for the fly agaric, and the cut off top of the plastic bottle will serve as a hat. And all this is pasted over with soaked pieces of egg containers

Wet egg trays resemble a viscous mass, which is slightly squeezed and attached to the frame in layers, just like plasticine or dough
Topiary Mushroom
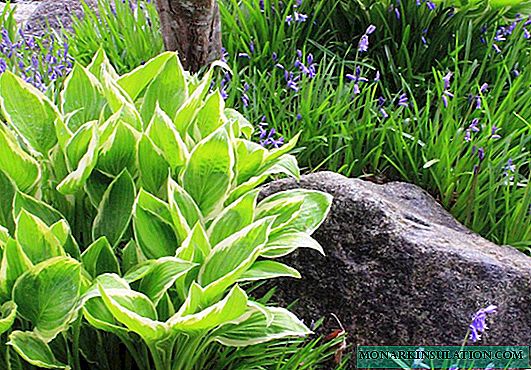
An unusual decoration of the garden can be a fabulous mushroom grown using the topiary technique. The basis for such a mushroom is a wire frame. If there is no nearby specialized store offering ready-made forms, create the frame yourself from a soft metal mesh or weave it from a rod.

The green mushroom is created on the basis of a metal frame filled with soil with lawn grass seeds, and the belly is made from Turkish shabo clove
The procedure is as follows:
- Overlay the inner walls of the frame with a roll lawn, starting from the bottom. Fill the middle of the frame immediately with fertile soil.
- From the outside of the mushroom, make holes in the lawn using a sharp knife, and plant low-growing ornamental plants in them, such as young plants, cineraria, alissum, etc. They will add brightness to the sculpture.
- While the grass has taken root, shade the sculpture, covering it with a non-woven material.
- Several times during the season, the mushroom will have to be cut so that it retains its shape, and periodically watered.
Here's how to fill the topiary frame with soil:
If there is nowhere to buy a ready-made grass lawn, do the opposite:
- Prepare in equal proportions a portion of earthen soil and humus.
- Stir and moisten the substrate. The earth must keep its shape if a lump is downloaded from it.
- Lay the finished substrate inside the frame, holding it from the outside with your hand so that it does not wake up much through the cells.
In this way, fill the entire figure. - Mix the rest of the earth with lawn grass and moisten even more.
- Brush the mixture with the whole figure from the outside.
- Shade with a spanbond and wait for shoots.
Remember that all work on creating a topiary mushroom must be carried out at the place where the figure will be located all the time, since you cannot lift the frame filled with soil. Before winter, all the grass from the figure is sheared, and in severe frosts the fungus will have to be covered.

From the mushrooms on the plot, you can create whole compositions that successfully combine with coniferous plants or tall bushes, such as jasmine, lilac
Mushroom glades and fabulous foresters will add a twist to any landscape. And fresh mushrooms, in addition, will be an excellent dish for a homemade breakfast.