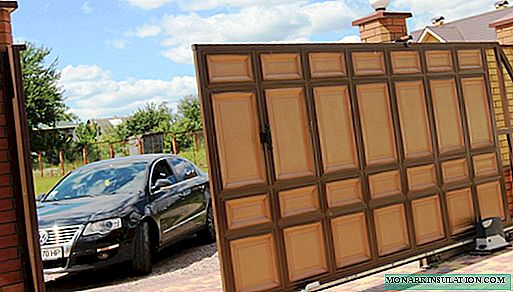
Sliding or sliding gates are gaining popularity among private developers, since all the necessary components for their installation at an affordable price have appeared on the market. At cost, swing gates are, of course, cheaper. Movable designs benefit in aesthetics and ease of use. You can reduce costs by saving on the services of installation companies by installing sliding gates with your own hands. It is not so difficult to do this if you understand the schemes, watch video tutorials, and consult with experienced home craftsmen. To carry out the work, a ready-made kit for mounting sliding gates of the console type is purchased, which includes two rollers, a supporting beam of a U-shaped profile, several traps and holders. Assembly and installation of the design of sliding gates is carried out in a certain sequence.
This video demonstrates the process of installing a sliding door with your own hands. After viewing all the previously raised questions on the installation of sliding gates will disappear by themselves. So every single operation is clearly and simply shown.
Briefly about the device of sliding gates
Below is a diagram and a list of the main elements of a ready-made set of sliding gates, presented on the market by both foreign and domestic manufacturers of this type of equipment.

Legend: 1. The guide U-shaped beam; 2. Roller bearings or trolleys (two pieces); 3. Removable end roller; 4. Lower catcher; 5. Top catcher; 6. Upper retainer with rollers (bracket); 7. Plate for fixing the roller bearings
On a foundation specially prepared for installation of sliding gates, a pair of supporting roller bearings is fixed at a certain distance from each other. The guide U-shaped beam is welded or screwed to the lower edge of the metal frame of the door leaf. Roller bearings not only withstand the load falling on them from the entire structure, but also ensure its free movement. The fastening of the supports is carried out using embedded bolts or a special plate that is securely fixed to the foundation.

Fastening of the roller bearings to the steel channel, which is laid in the foundation together with the reinforcing cage, is carried out using bolts or welding
The gates are mounted on roller trolleys so that they are inside the U-shaped carrier beam. This arrangement protects the rollers from contamination, which affects the duration of their trouble-free operation. As a result, the gates are easily rolled back to the side, both in manual control mode and in automatic mode using an electric motor.
Important! The frame for the door leaf, welded from a profile pipe with dimensions of 60x40x2 mm (main frame) and 20x20x1.5 mm (lintels), should be quite rigid. After all, the door leaf is under the influence of wind loads, which can be very significant. The canvas also should not be subjected to any deformation under pressure of its own weight.
A number of manufacturers are engaged in the production of accessories for sliding gates, among which the most famous on the Russian market are ROLTEK (St. Petersburg), CAME and Rolling-Center (Italy), DOORHAN (Moscow).
The sets of components necessary for installing sliding gates are divided into three sizes according to the weight of the structure and the width of the opening in the light:
- small (up to 400 kg and up to 4 m);
- medium (up to 600 kg and up to 6 m);
- large (from 600 kg and from 6 m).
When choosing the right kit, they are guided by the width of the blocked opening, the height of the canvas and the total weight of the entire structure.
Preparatory phase - pouring the foundation
Work on the foundation for sliding gates begins with the marking of the trench. At the same time, the length of the concrete base equal to half the width of the passage is laid off from the edge of the opening from the side of the gate rollback. The width of the foundation foundation is 40-50 cm. When calculating the depth of the pit, the level of soil freezing in the area is taken into account. In the Moscow Region, the foundation is laid with a depth of 1.7 m, and in Siberia - 2.5-3 m.
From the channel 18 and the reinforcement (d 12), a mortgage element is made, connecting all the parts by welding in accordance with the scheme. The channel must be used to strengthen the strength and rigidity of the base under construction. The low alloy steel used in the production of channels is able to withstand the effects of low temperatures and is not susceptible to corrosion. The length of the channel blank is equal to half the width of the opening. The length of the vertical reinforcing bars is calculated from the condition that they should go below the depth of freezing of the soil.

The embedded frame is welded from the channel 18 and reinforcing bars, the diameter of which is 12 mm. The fittings can be replaced with steel corners.
Connecting the vertical rods with steel jumpers, a strong reinforcing cage is obtained, which is lowered into a prepared trench for pouring the foundation. Previously, a layer of sand is poured at the bottom of the trench, which is carefully compacted.
Important! The foundation level must match the level of the road. The clearance must be higher than 5 cm, so that there are no problems when operating the door in winter.
Before pouring the foundation, check the horizontal position of the reinforcing cage using the building level. During alignment, it is also ensured that the longitudinal axis of the steel channel is parallel to the fence line.
If you plan to install a drive to automate the management of sliding gates, then at the stage of pouring the foundation, wires are laid, hiding them in special corrugated tubes. The exit location of the wire bundle is selected based on the planned location of the electric drive. Typically, equipment is installed in the middle of the foundation.

The reinforcement cage is lowered into the trench prepared for the foundation. The plane of the steel channel is aligned with the level of the roadway
To fill the foundation, a concrete solution of 4-5 bags of cement M400, crushed stone (0.3 cubic meters) of sand (0.5 cubic meters) is kneaded. The poured foundation is left alone for 3-5 days, during which the concrete will gain the necessary strength. After the specified time, they begin to install sliding gates.
Step-by-step installation instructions
Mark the line of movement of the gate with a cord stretched along the opening, positioning it at a height of 200 mm from the surface of the roadway and at a distance of 30 mm from the counter pillar. On this cord you will align the position of the supporting profile (beam).
Prepare the roller trolleys for installation and insert them sequentially inside the supporting profile beam. Then move the carts to the center of the gate. Place the door leaf with the roller bearings inserted into the profile on the steel channel of the embedded structure. Then place the first and second supports in the marked out places, and adjust the gates so that they are parallel to the stretched cord and touch it.
Attaching roller carts to the channel
Weld the adjustment pad of the second roller support to the channel. Having rolled the gate into the aperture to the very end and having checked the horizontal position of the web, weld the adjustment pad of the first roller support.
- Remove the sliding door leaf from the roller bearings.
- Remove the supports themselves from the adjustment pads.
- After welding along the contour, weld the adjustment pads to the steel embedded element.
- Fasten the roller bearings to the welded leveling pads.
- Slide the sheet of the sliding gate onto the roller bearings.
- Install the gate in the closed position and adjust the horizontal position of the plane of the supporting profile. To do this, raise or lower the adjustment pads with each other using a wrench.

Installation of the front carrier of the roller carriage is carried out 150 mm from the edge of the doorway, so that when they are fully opened, the end roller will abut against the support
Important! It is possible to give the horizontal position to the gate only if they are in the closed state.
Freewheel adjustment
Adjust the position of the roller bearings inside the support profile. To do this, slightly loosen the upper nuts securing the roller bearings to the adjustment pads. Close and open the gate, rolling them from edge to edge, several times. In this case, the roller bearings can occupy the correct position inside the supporting profile, in which the gate moves easily and freely. After adjusting the gate’s free play, tighten the upper nuts of the roller bearings tightly.
Mounting the end roller and plugs
Next, an end roller is installed, as well as a plug for the carrier profile. For this, an end roller is inserted inside the supporting U-shaped profile, placing it on the front side of the door leaf, and the part is fixed with fixing bolts.
The supporting profile plug supplied in the set of sliding gates is welded from the back of the sheet. This part prevents the supporting profile from clogging with snow in winter, which prevents the gate from jamming.

When installing the upper bracket, it can be used for fixing both an anchor and welding. Bracket rollers lubricate after installation for better glide
To install the upper guide bracket, loosen the fasteners of its rollers. Then the bracket is placed over the door leaf in such a way that the rollers touch the top edge of the door leaf, and the side with the holes provided for the fastener is directed towards the support column. Pressing the bracket to the surface of the support column, fix the part with fasteners.
Covering the door leaf with a professional sheet
After proceeding to sheathing the frame frame of the gate with a profiled sheet, cut in height and width to the desired size. Installation of the profiled sheet starts from the front edge of the gate. The casing is fastened with self-tapping screws or rivets. Each subsequent sheathing sheet is superimposed on the previous one-wave sheet.

As a material for covering sliding gates, a profiled sheet is most often used, which is complemented by forged elements that give the building an elegant and special look
Installing traps: why and how?
One of the last stages of installing a ready-made set of sliding gates is the installation of catchers. The lower trap, installed with a fully loaded door, allows you to partially remove the load from the roller bearings when the blade is closed. To determine the position of the lower trap, it is necessary to close the gate and combine it with the end roller.
The upper trap allows you to keep the door leaf in the closed state from swaying during the operation of sailing loads. Installation of the upper trap is carried out at the level of the protective corners, and in the closed position they (corners) should touch the brackets of the upper trap.
Rules for self-installing automation
At the last stage, the installation of automation is carried out, if this option was originally planned. The movement of the sliding gate leaf is carried out with the help of gear racks, sold meter-long pieces together with fasteners. Reiki are attached to the supporting profile. When installing automatic sliding gates with your own hands, you should know that in addition to the gear racks, you will need an electric drive, a remote control, a beacon lamp and a key. Everything is installed in full accordance with the requirements of the instructions attached to the equipment for automatic control of the movement of the gate. If you have any difficulties, you can contact an experienced electrician.
As you can see, you can cope with the installation of sliding gates on your own. However, this process cannot be called easy. Not only knowledge, but also physical effort is needed. Therefore, many private developers prefer to trust the installation of sliding gates to professionals.