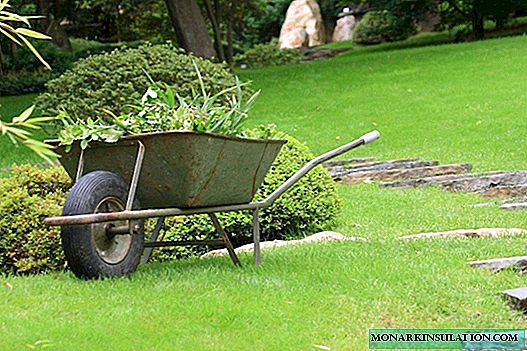
There is always a lot to do on the garden plot. From time to time you have to endure something heavy, and this is not always good for your health. It is especially difficult for those who are not used to serious physical exertion. To get pleasure from staying at the cottage, and not pain in the spine, you need not carry heavy loads in your hands, but transport them on a trolley. A DIY wheelbarrow made from improvised materials will be an excellent assistant for the period of construction, harvesting and other works. Moreover, for its construction no special skills or materials will be needed. Everything you need, or is already in the country, or is not difficult to buy.
Option # 1 - a sturdy and simple wooden car
You can buy a garden and construction car in every store. But there is no need to waste money if you can do it yourself? Drawings for the construction of a wooden wheelbarrow are not needed: the product is simple and does not require significant material costs. If something is not enough, you can always buy in the process.
Tip. When constructing a garden car, you need to give preference to solid varieties of wood: elm, birch, oak or maple. Such material will last a long time and will be reliable in operation. Coniferous species are better not to use.
We make a mounting frame
From planed boards we assemble a box - the basis of the product. We select sizes based on our own physical preparation and farm needs. In our example, the width of the box is 46 cm, and its length is 56 cm.
The box and wheel will be mounted on the mounting frame - the main supporting part of the car. For its construction, we will need two bars 3-5 cm thick and 120 cm long each. We will use the same bars as handles for cars. It is convenient to hold on to their ends in order to move goods around the site.

It is important to choose the right wood for a wheelbarrow: soft wood species are more susceptible to decay, are more deformed during operation and, as a result, will last a little
We place the bars on the table, connecting the front ends to each other. The opposite ends of the bars are pushed apart by a distance of the width of their own shoulders. On the connected ends on top we place a bar of a smaller diameter. In the photo he is depicted in a different color. It must be outlined with a pencil, leaving parallel lines on the bars of the frame. So we mark the place where the wheel will subsequently be mounted to the bars. On the drawn lines at the bars, we make saw cuts with a hacksaw or circular saw, as shown in the photo.
The wheel will also be wooden
We will also make a wheel with a diameter of 28 cm from wood. We take six well-rounded boards with dimensions of 30x15x2 cm. We glue them into a square as shown in the figure, using PVA glue. We keep it under the press for about a day: until the glue completely dries. Mark a circle on the surface of the square. In addition, we fasten the future wheel with wood screws. We drill a wheel, focusing on the outer part of the marking. The rough surface of the rim is processed using a rasp.

If you are making a wheelbarrow for gardening, it is better to buy a finished wheel (metal with a rubber tire). And if you make a decorative wheelbarrow, then nothing is better than a tree
Mount the frame and wheel
We return to the mounting frame. We connect two bars with each other using a spacer. It must be installed so that a wheel fits between the front ends of the bars (those that are sawn from the inside). With a wheel width of 6 cm, the distance between the ends of the bars should be 9 cm. Based on these considerations, we determine the size of the spacer, file its ends and attach it to the bars with self-tapping screws.
For mounting the wheel we need a metal stud with a thread length of 150-200 mm, 4 nuts and 4 washers. All with a diameter of 12-14 mm. At the ends of the bars we drill holes for this hairpin. Exactly in the middle of our wooden wheel, we drill a hole that slightly exceeds the diameter of the stud.

In the same way, a body in a metal wheelbarrow is welded to its mounting frame. The basic methods of work are the same and do not depend on the material used.
We insert one end of the stud into the hole on one of the bars. We install a washer on the stud, then a nut, then a wheel, then another nut and washer. We pass the hairpin through the second beam. We fix the wheel on the outside of the bars with washers and nuts. The hairpin must be firmly fixed on the bars, so we tighten the fastening with two wrenches.
It remains to assemble the finished product
On the box turned upside down, place the mounting frame with the wheel so that the wheel does not touch the box. We mark the position of the frame on the box with a pencil. We make two wedges in the entire length of the box 5 cm thick and 10 cm wide. We put them on pencil lines and attach to the box surface with screws on the bottom of the product. We also attach a frame with a wheel to these wedges with screws.

It remains to install a spacer that rigidly fastens the racks together. The car is ready, you can dig it with linseed oil and use it in work
We make brackets so that it is convenient to put the wheelbarrow during loading and unloading. We select their length so that when installed on them, the box is parallel to the ground. A rigid connection of the racks provides a block-spacer, attached as shown in the photo. It remains to cover the finished product with linseed oil so that the car will serve you faithfully for many years.

A wheelbarrow made of wood serves for a long time to the delight of the owners, but even after the product fails, it does not clutter up, but decorates the site as a creative flower garden
By the way, such a trolley looks quite decorative and is able to decorate any area, if it is no longer needed in work.
Option # 2 - wheelbarrow made of metal or barrels
A universal wheelbarrow that can be used when harvesting, and when performing construction work, must be strong. For transportation of cement, sand or soil, it is better to use a metal product. It’s also easy to make such a car yourself, but you will need the skill of working with welding equipment.
An excellent option may be a trolley, welded from a sheet of metal, 2 mm thick. Initially, the body is assembled from a sheet, after which the chassis and handles are welded to it. Depending on the expected load on the finished product, wheels from a motorcycle, moped and even a bicycle can be used for it.
You can reduce the cost of the product if its box is made, for example, from an old iron barrel. It is better to start work with the manufacture of a supporting structure in the form of the letter "A". A light metal profile (square, pipe) is suitable for her. The bow of the structure is equipped with a wheel, and its response elements will be used as handles.

As a rule, such barrels get to their owners "on occasion" and are very cheap, and a garden car from this iron barrel will be light and very convenient.
Half the barrel, cut lengthwise, is fixed on the frame. Under the supporting frame, you need to weld arcs or pipes, which will play the role of racks. They are needed so that the car has acquired the necessary stability during loading and unloading.
Now that you know how to make a garden wheelbarrow yourself, you do not have to buy products from China in stores, which last for a very short time.