The owners of private houses, accustomed to interruptions in the water supply system, are sure to add an alternative source of water supply to the site. After all, public services, as luck would have it, carry out preventive work in the summer, when water is needed for both the garden and flower gardens. A well is a more modern source of drinking water, but special equipment is needed to create it. If you decide to do everything on the site yourself from start to finish, then the easiest way to build a well with your own hands.
Choosing a place for a well
When choosing a site for a well, the determining factor is the quality and quantity of groundwater. We already wrote about how to find places with better water, so we’ll look at a few more points to consider.
- It is allowed to dig a well only far from various sources of household pollution entering the soil. Those. from the toilet, animal walking areas and dung heaps should be at least 30 meters.
- If you have an autonomous sewage system that does not have a bottom, you will either have to redo it, making it completely airtight (it is better to put a factory plastic container!), Or abandon the construction of any wells with your own hands. Groundwater will certainly bring household waste water to the source, and your water will become not just tasteless, but also smelly and unsafe.
- To avoid the appearance of drains from neighbors, it is better to place the well in a high place where, according to physical laws, the liquid simply does not flow.
- If you keep animals (a cow, pigs, etc.) that need to be fed daily, then place the well at approximately equal distance between the house and the sheds. For household needs, they put wells closer to the house (but not back to back, but keeping at least 5 meters from the building).
Before you start to make a well, wait for the desired season, i.e. fall or winter, when groundwater is at maximum depth. If you start work in the spring, then there is so much water in the ground at this time that in 90% of cases you will fall on it. Then in the summer your well will constantly dry up.
Mine or tubular well: which is better?
There are two types of well structures: mine and tubular. Tubular usually put a few pieces in the village. They were called columns, and water was taken from the depths with a hand pump. A tubular well is put in places where the waters pass shallow, it is created quickly, but! They do not dig it, but drill it. Accordingly, drilling equipment is needed.

It is impossible to create a tubular well without special equipment
We are considering the easiest way how to make a well, which means that tubular will not suit us.

Even one person can build a well
There remains one option - the mine, which is dug with the usual shovel available for each owner. This is a traditional type of well for the private sector, because it is easiest to create on your own.
How is the shaft type well arranged?
Knowing the structure of a mine well, it will be easier to create it yourself. The design has three main parts:
- water intake - the lowest part, which serves to collect and filter water.
- trunk - the entire underground structure above the water intake. It does not allow the soil to collapse and does not let in the overhead water, preserving the quality of the water.
- head - everything that is located outside, above the ground. It prevents dust particles and debris from entering the water, and in winter it protects against freezing.
In addition to the basic elements, we need additional ones, with which we raise water up. This is a gate, chain, bucket.
Getting ready for digging: studying TB
Inexperienced owners often forget about basic safety rules, non-observance of which can jeopardize the health of a person working in a mine. Recall them to avoid injury.
- The digger must have a protective helmet on his head. If the bucket pulled out by the assistant, this will help avoid injury.
- Buckets with soil are raised on thick ropes, the rings are lowered by ropes.
- When digging a mine over 6 meters on a bucket, 2 ropes are fixed: the main and the safety.
- To insure against movement of the soil, the digger must be tied with a rope, the second end of which is firmly fixed to something solid on the surface.
- If the mine turns out to be deep, then be sure to periodically check whether there is gas contamination. To do this, light a candle. If it goes out, it means there is a lot of gas, and we need to weather it. To do this, they climb out of the shaft, tie a large blanket to the rope and lower it several times to the bottom and back. Typically, the gases with the blanket go up. After that, you can go down again, check the air quality with a candle and continue to work. If the gases do not come out, you will have to look for a fan and lower it down.
Underground digging sequence
In the old days, the trunks were wooden. Today, the easiest way is to make the barrel part yourself from ready-made concrete rings. But when ordering, choose the right size. Since we do not use equipment, each ring will have to be lifted, tossed and turned, and with large dimensions this will be impossible. The optimal height of the ring is 25 cm. Select the diameter of the inner walls of at least a meter, otherwise it will be crowded and uncomfortable to dig. To reduce stress on your hands, find a winch or tripod. Using it, it’s easier to remove the excess earth, and it’s easier to manage the rings.

A tripod allows you to avoid unnecessary load when lowering the concrete rings
Consider how to build a well with your own hands, using ready-made rings.
Digging the barrel and lowering the rings
The procedure is as follows:
- They dig a shovel with a short stalk, because it is easier to handle with it in a cramped space.
- Having gone deep into the ground by half a meter, they put the first ring. It is pulled up by a winch, sent exactly to the shaft and lowered. Under its own weight, the concrete will gradually settle deeper and deeper. You can even jump on it to quickly drown.
- After digging another 0.25 meters, they lay the next ring, etc., until they reach the aquifer. They try to put the rings as tightly as possible, and so as not to move to the side, they are fixed to each other with metal brackets.

When we went deep by half a meter - it's time to roll up the first concrete ring

The rings should be placed strictly vertically, so check each installation with a plumb line
With this approach, they dig up to water for about 5 days.
Important! There is another version of digging: at first they completely dig a mine, and only then all the rings are lowered. Without practice, this method cannot be used, because there is a great risk of soil collapse, and this can turn into a tragedy for a person in a mine.

With this method of digging, there is a possibility of collapse of the upper layer of the earth
Arranging a water intake
Having got to the bottom of the aquifer, you will see how gradually the bottom begins to fill with muddy water. To clean it, you must create a bottom filter.
For this:
- Pump out all the cloudy liquid.
- Dig the bottom to a depth of 15 cm and level it, and the dirt is removed to the surface.
- The bottom is filled with a 25-cm layer of clean river sand.
- Fine crushed stone or gravel is scattered on top (20 cm layer).
- The last is a layer of coarse gravel (20 cm).
Crushed stone and gravel should be pre-washed with a weak solution of bleach.
If the water arrives quickly and the bottom swims instantly, first put the flooring from the boards with slots, and cover it with all the layers of the filter.
Waterproofing the walls of the well
Waterproofing
After the underground part of the well was built, it is necessary to waterproof the walls. To do this, use a mixture of PVA glue and cement, stirring them until a homogeneous mass is obtained. She seals the seams between the rings. To better penetrate the composition, first all the seams are smeared with a brush with a liquid solution, and then a thicker mass is applied after the spatula. You can buy a ready-made waterproofing compound or liquid glass.

When sealing joints, do not forget about small cracks and pits that quickly destroy concrete in water
Attention! Do not use mastics that contain bitumen to smear the joints, otherwise spoil the taste of the water.
Outdoor waterproofing
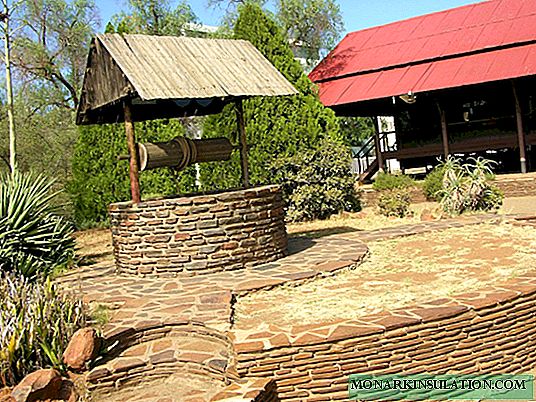
To protect the water from the ingress of rain or melt water through the soil, on the outer edge of the upper rings (1.5 - 2 meters) leave a trench half a meter wide, which is densely packed with clay. Having reached the soil level, the clay castle is made with a slope to divert precipitation from the well. But it is better to concrete the platform over clay.

A clay castle will not allow all moisture from the soil surface to enter the shaft.
Some owners also protect the upper rings with plastic wrap, wrapping the outer walls with it and fixing with waterproof glue.

By closing the outer walls of the rings with polyethylene, you will increase the level of waterproofing of the well
After creating the underground part of the well, water is pumped out repeatedly for 2-3 weeks, using for domestic purposes. During this time, the well will be cleaned, but you should not drink from it until you turn it over to the laboratory for analysis. Only after a conclusion on the safety of water can it be used for drinking.

Turbid water is pumped out for 2 weeks.
Well outside: arrangement of the tip
In addition to the direct responsibility to protect water from debris, the head also performs an aesthetic function, so its design is very diverse. How you come up with it depends only on the size of your imagination. The easiest way is to put the same concrete rings, overlaying them with an artificial stone on the outside, plastering or covering with a beam.

The head design is usually matched to the landscape of the site.
But there are mandatory points that should not be missed:
- Make a roof with a large overhang to maximize the purity of the water.
- Put a lock on the roof door so that curious children do not look in there.
- The gate on which the chain with a bucket is wound must have Ø 20 cm or more.
- When the axles and the handle are inserted into the gate, 2 washers must be installed from the handle, and one on the opposite side. They will not allow the gate to move and increase the service life of the lifting elements.

Washers on both metal axes of the gate will protect the structure from displacement
And now, when you figured out how to make a well, you can test your knowledge in practice, and by the New Year, please your loved ones with delicious water from your own source.