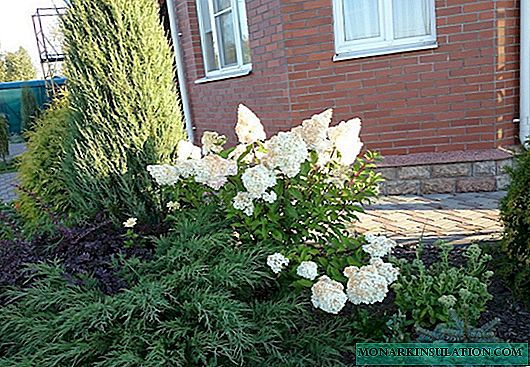
Original visors, spacious pavilions and translucent canopies today adorn the courtyards of many sites. The buildings, decorated with modern building material - polycarbonate, look very attractive, harmoniously blending into the architectural ensemble. Owners of private houses are increasingly equipping polycarbonate canopies with their own hands, creating picturesque arched structures. Semi-matt and transparent canopies made of a colored polymer base, in addition to direct use, become a spectacular decoration of the front zone, playground, or patio.
Polycarbonate Canopy Applications
Polycarbonate is a universal roofing material. Acting as a worthy alternative to wood, glass or metal, it serves as the basis for the erection of canopies, which are quite widely used in suburban construction.
Option # 1 - a visor above the balcony
Equipping the balcony with a transparent plastic canopy, freely letting in the sun, you can create a real greenhouse, which will act as a decoration of the house throughout the year.

A polycarbonate canopy protects the walls of the house and the site attached to it from the development of mold and fungi and extends the life of the wooden elements of the building
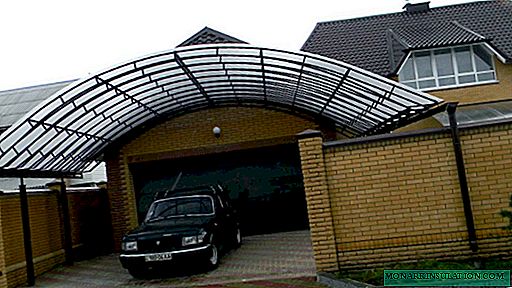
Option # 2 - Carport
Rigid structures are able to withstand strong gusts of wind, a translucent roof creates a small shadow.

Rectangular and arched canopies can perfectly protect the car not only from snow and rain, but also other external factors that have a negative impact
Article in the subject: Parking for a car in the country: examples of outdoor and indoor parking
Option # 3 - A canopy for a gazebo or patio
Polycarbonate is ideal as a roofing material for arranging a gazebo, indoor recreation area, patio or barbecue.

A semi-gloss or transparent roof will give a diffused shadow, due to which a slightly muffled interesting lighting will be created inside the arbor
Option # 4 - a canopy over the porch
Due to the wide variety of polycarbonate color palettes and the special structure of the material, which easily takes any form, you can always create a structure that fits perfectly into the architectural composition of an existing structure.

A beautifully designed canopy will protect the front part of the house and the adjacent porch with a porch from scorching sunlight in the summer months and bad weather in the cold season
You can also make a gazebo out of polycarbonate, read about it: //diz-cafe.com/postroiki/besedka-iz-polikarbonata-svoimi-rukami.html
The choice of material for the construction of the canopy
In suburban construction, for the arrangement of awnings, cellular polycarbonate is most often used. Strong panels consisting of several layers of plastic, which are connected between by means of vertical stiffening ribs, have excellent quality characteristics. Besides the fact that they have an aesthetic appearance, polycarbonate panels are quite easy to mount and bend, assuming an arched shape. Due to the special structure of the material, polycarbonate is able to protect against the negative effects of UV radiation.
When choosing material for arranging a canopy, you should be guided primarily by the purpose and type of future construction.

When calculating a polycarbonate canopy, you need to take into account: wind and snow load, crate pitch and bending radius
A competent calculation will prevent unnecessary costs: if you buy sheets that are too thin, you will need a more frequent crate step, while installing the most durable panels will also incur additional costs.
When choosing polycarbonate panels, it is necessary to take into account the thickness of the material:
- Panels with a thickness of 4 mm are designed for the construction of greenhouses and hotbeds.
- Cellular panels with a thickness of 6-8 mm are designed for the construction of partitions, awnings, peaks and roofs.
- Noise barriers are erected from 10 mm thick sheets, they are used for the construction of vertical surfaces.
- The thickest panels with a thickness of 16 mm are characterized by increased strength. They are used for roofing large areas.
The palette of shades of cellular polycarbonate is wide enough, which allows you to choose the option that is best suited for the arrangement of a building.

Green and blue translucent plastic panels decorate the canopy above the pool. Brown and cherry shades of the canopy complement the picturesque picture of the buildings twined with greenery
You can find out how to make a pool pavilion from this material here: //diz-cafe.com/voda/pavilon-dlya-bassejna-svoimi-rukami.html
The main stages of the arrangement of the canopy
Stage # 1 - structural design
Having decided on the location of the building structure, you should develop a project for the canopy. The design, which is carried out before making a canopy of polycarbonate, allows not only to correctly calculate the necessary amount of materials during construction, but also to prevent the occurrence of possible deformations during operation.

When designing the base and the aerial part of the canopy structure, it is necessary first of all to measure the parameters of the site and based on this make the calculation of the frame taking into account the longitudinal and transverse steps
When developing the project, one should also take into account the climatic features of the terrain and the loads created by external factors.

To install polycarbonate sheets with a thickness of less than 8 mm, a step of 600-700 mm is sufficient. When arranging heavier panels, longitudinal steps are performed with a size of 700 mm, and transverse - up to 1 meter
Stage # 2 - erection of a platform under a canopy
The site for the arrangement of the canopy is planned using pegs and leveled. Along the perimeter of the site at a distance of 1-1.5 meters using a drill, they dig holes for the installation of support posts, which are most often used wooden beams or metal poles.

The supports are buried directly in the soil by 50-150 cm, leveled with the help of a building level and concreted, or fixed on specially embedded parts according to the same principle
When used as supporting posts of wooden beams, the lower part of the posts is treated with bitumen or any protective composition that prevents rotting of wood.
After waiting a couple of days until the supports settle down and the concrete gains sufficient strength, a layer of soil 15-20 cm thick is removed from the entire territory of the marked site. The bottom of the foundation pit is covered with a sand or gravel "pillow" and rammed.
At this stage of construction, it is desirable to provide for the arrangement of grooves and the placement of drainage pipes to drain rainwater.
As a final cover you can use:
- concrete screed;
- paving slabs;
- lawn grate.
To lay this coating around the perimeter of the site, formwork is installed. The bottom of the pit, covered with a gravel "cushion", is poured with concrete mortar 5 cm thick, on top of which the mesh from the reinforcement is immediately laid and re-poured with the same layer of concrete. The formwork is removed after 2-3 days, when the concrete hardens. The concrete flooded area itself should stand at least 2-3 weeks: during this period, concrete will gain the necessary strength and naturally get rid of excess moisture.

Concrete screed is well suited for flat areas, the soil of which is not subject to displacement

Paving slabs are more suitable for "floating" and heaving soils. Unlike concrete screed, paved paving slabs do not form a monolithic layer, thereby allowing the earth to "breathe"
The tile is laid directly on the sand "pillow", ramming the elements with a rubber mallet that does not damage the surface of the coating. It is better to use a curb stone as a frame that will prevent the coating from spreading off the site. Having laid the tiles, the surface of the site is watered. As a coating, you can also use natural stone, clinker brick or paving stones.

Lovers of natural materials can opt for a lawn grate through which grass grows through the cells.
The polymer material, which acts as the basis for the grate, will provide drainage and protect the lawn from trampling, while maintaining its attractive appearance throughout the season.
Stage # 3 - installation of the frame
Vertical support posts are attached to embedded parts. During the construction of the frame from metal poles, the upper strapping around the perimeter and the vertical posts of the structure is performed by electric welding. After that, using vertical struts, the transverse elements of the frame are fastened to the supporting beams.

Most often, transverse elements give arched and domed, single and gable forms. In addition to a presentable appearance, arched structures prevent the accumulation of snow, dirt and fallen leaves
All welding seams of the frame are cleaned, primed and painted.
Also, polycarbonate is perfect for building a greenhouse, you can learn more from the material: //diz-cafe.com/postroiki/teplica-iz-polikarbonata-varianty-konstrukcij-i-primer-postrojki-svoimi-rukami.html
Stage # 4 - Laying Polycarbonate Sheets
The reliability and durability of the construction directly depend on the quality of installation of the roof of the canopy made of polycarbonate.
To lay polycarbonate panels you will need tools:
- construction knife;
- circulation saw;
- drill;
- screwdriver.
Sheets up to 8 mm thick can be cut with a construction knife, and thicker panels with a circular saw with disks having small undiluted teeth. All work on cutting sheets should be carried out only on a solid and even surface.

Cutting sheets must be performed taking into account the orientation of the air channels. Those must match the direction of the bend or slope.
The outer side of the panel, which protects against UV radiation, is covered with a special transport film on which the manufacturer applies images with installation instructions. All work on cutting and drilling holes can be carried out without removing the protective film, removing it from the surface of the panels only after installation of the canopy.
Tip. To bend the plastic panel in an arc, you need to attach a profile to it along the channel line in which to make small cuts and bend, giving the desired shape.
Fit polycarbonate sheets are laid on the frame and fixed with self-tapping screws and thermal washers with a diameter of 30 mm.

Such thermal washers with a silicone base are able to provide excellent sealing of joints
Holes for fastening, the diameter of which should be 2-3 mm larger than the size of self-tapping screws and thermowells, must be placed between the stiffeners at a distance of 30 cm from each other. When fixing the sheets to the frame, the main thing is not to pull, so as not to break the edges of the holes in the plastic panel. The sheets themselves are fastened together using H-shaped profiles, under which the edges of the panels are brought in by 20 mm, leaving small gaps.
When connecting polycarbonate sheets to each other, it is necessary to observe the rule of arranging compression joints: leave 3-5 mm gaps for the possibility of displacement of sheets at temperature extremes.

The edges and open ends of polycarbonate panels are closed with special overlays, aluminum or perforated tapes with microfilters, and then glued with sealant
Such processing will prevent the penetration of empty panels of debris, dust and small insects, and also prevent the accumulation of condensate.
The canopy is ready. Maintenance of the structure consists only in timely cleaning of the surface using ordinary water without the use of detergents, which can damage the protective layer of polycarbonate panels.